1) After logging in to your MBL Account, click the "Settings" Icon and then click "Users"

2) Find your own abbreviation and click it. Then hover over the "Actions" Button and press "Set Signature"

3) In the pop-up window type your name and surname and click Save.

Now you have a digital MBL Signature. It is time to sign some documents.
4) Hover over "Modules" and click "My Activities" (This may also be put as a Shortcut which will eliminate the need to hover over "Modules").
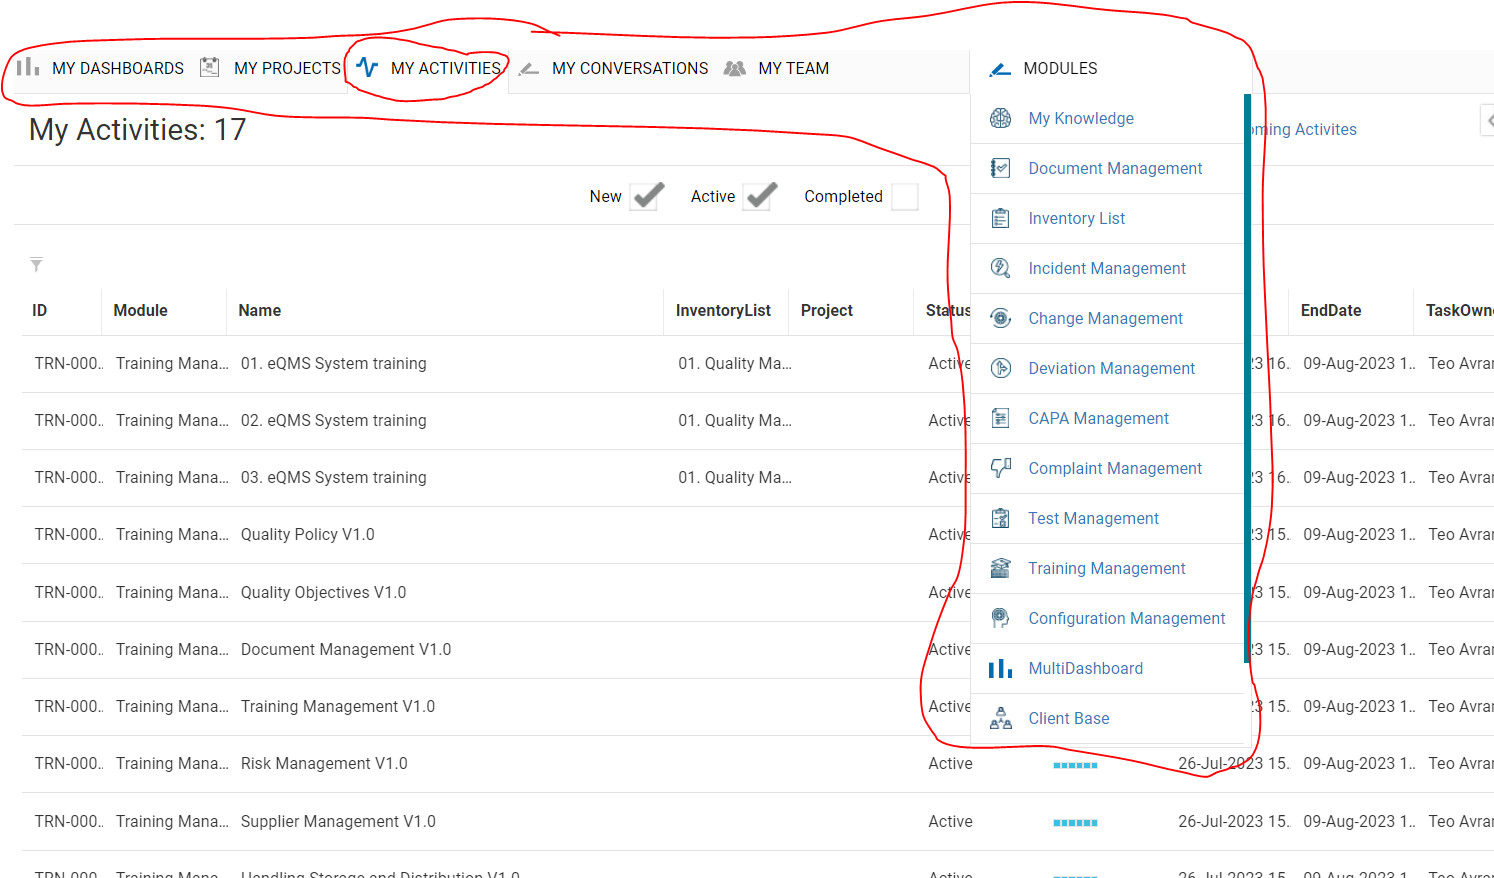
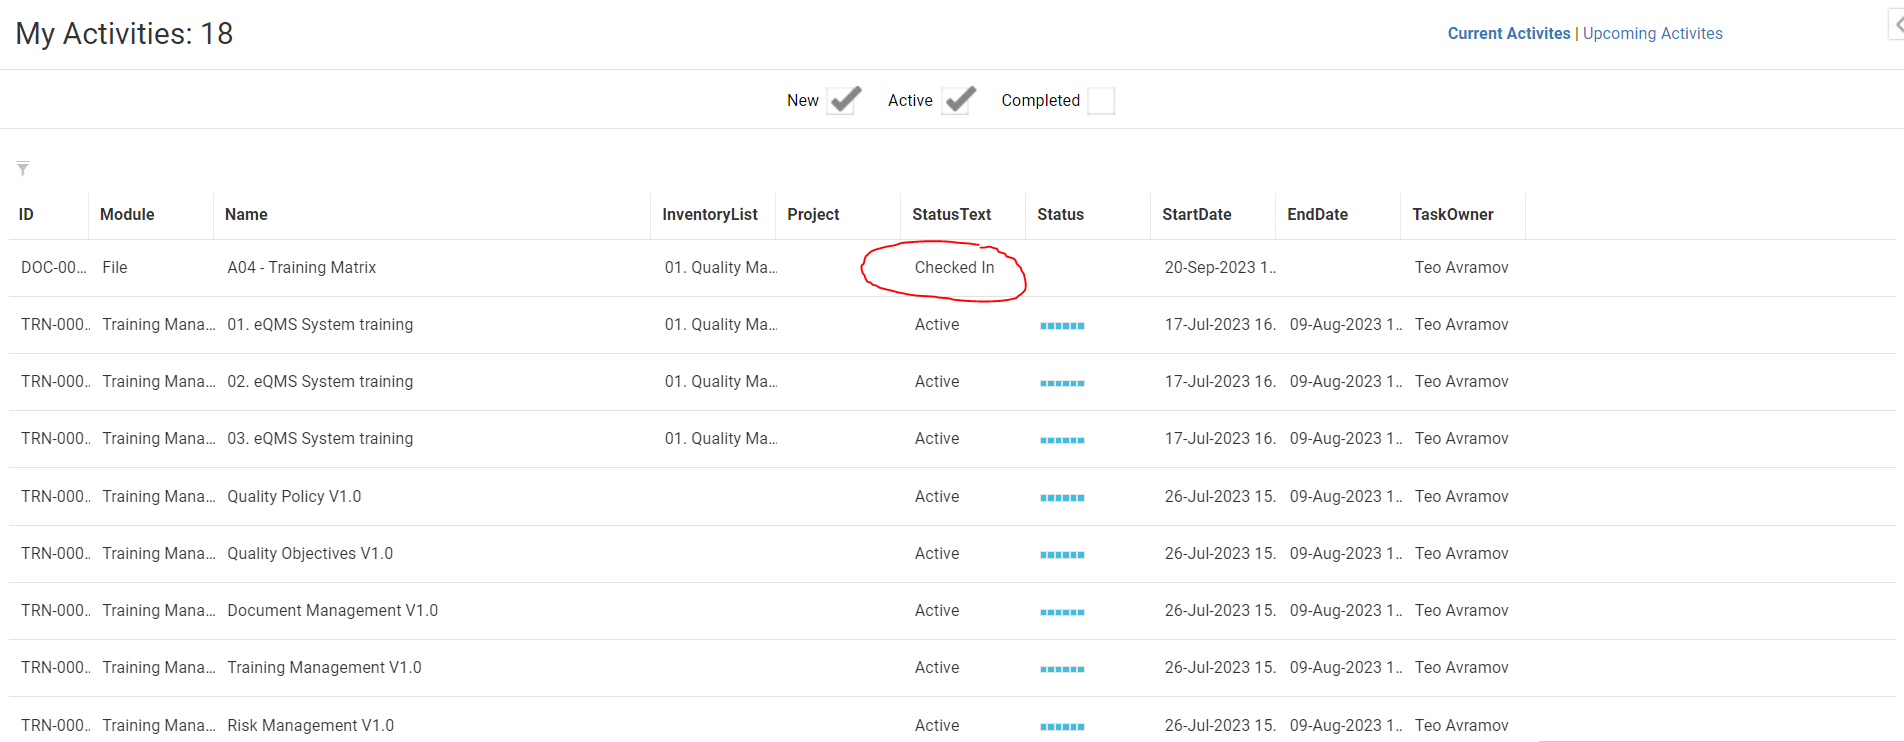
5) Open an activity which requires your Signature and then click on the "Document Name/Number" (look at the "Status Text" - Checked In means that a signature is required while "Active" often means that it is a pending Training)
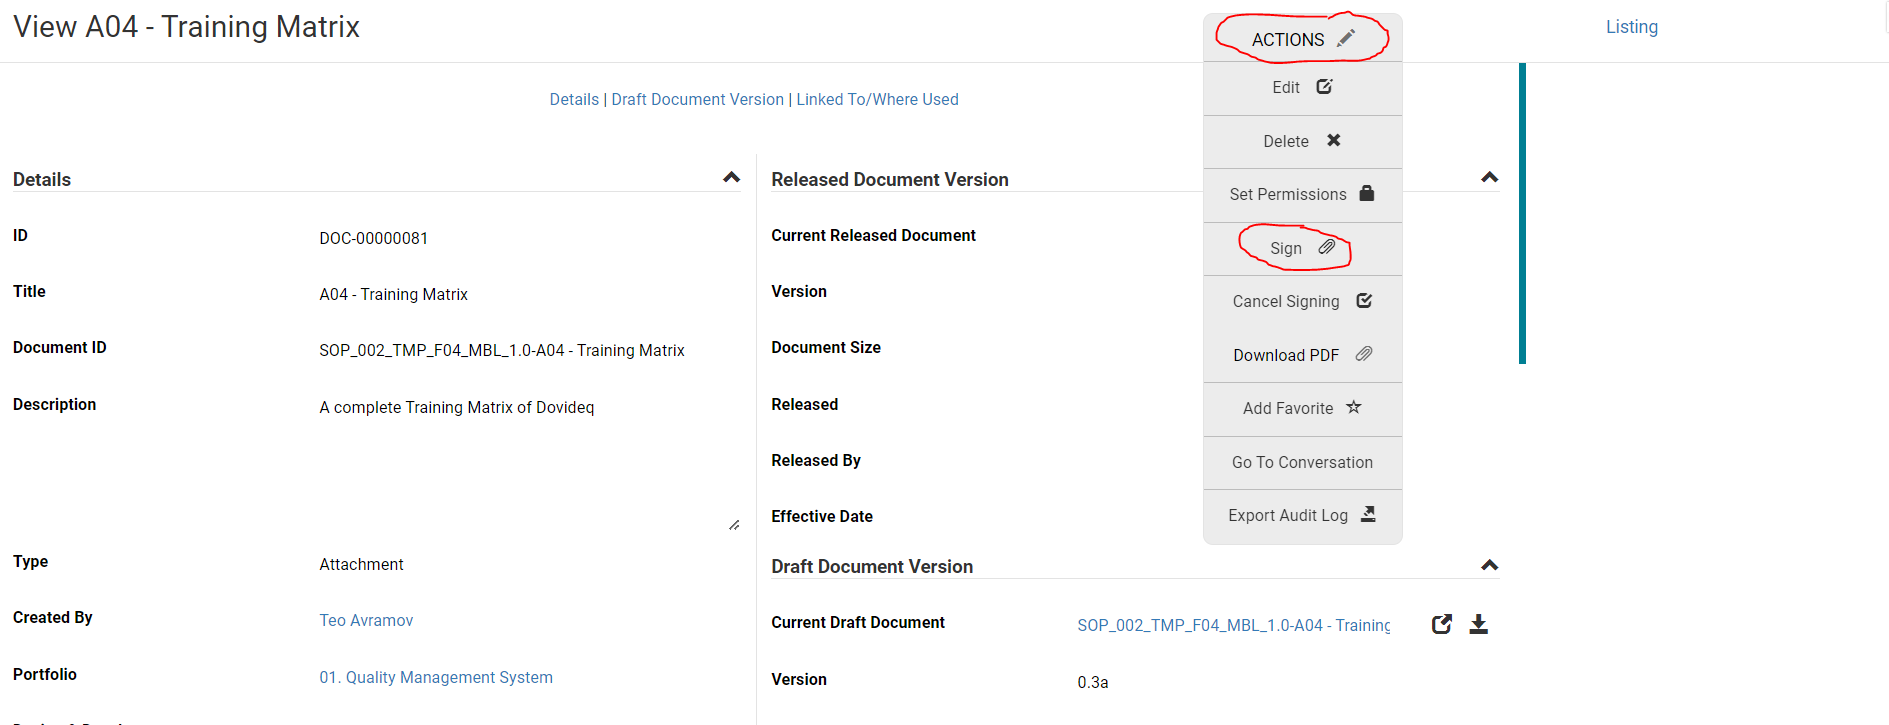
6) Now hover over the "Actions" button and click "Sign"
7) Find your name in the document and click the square
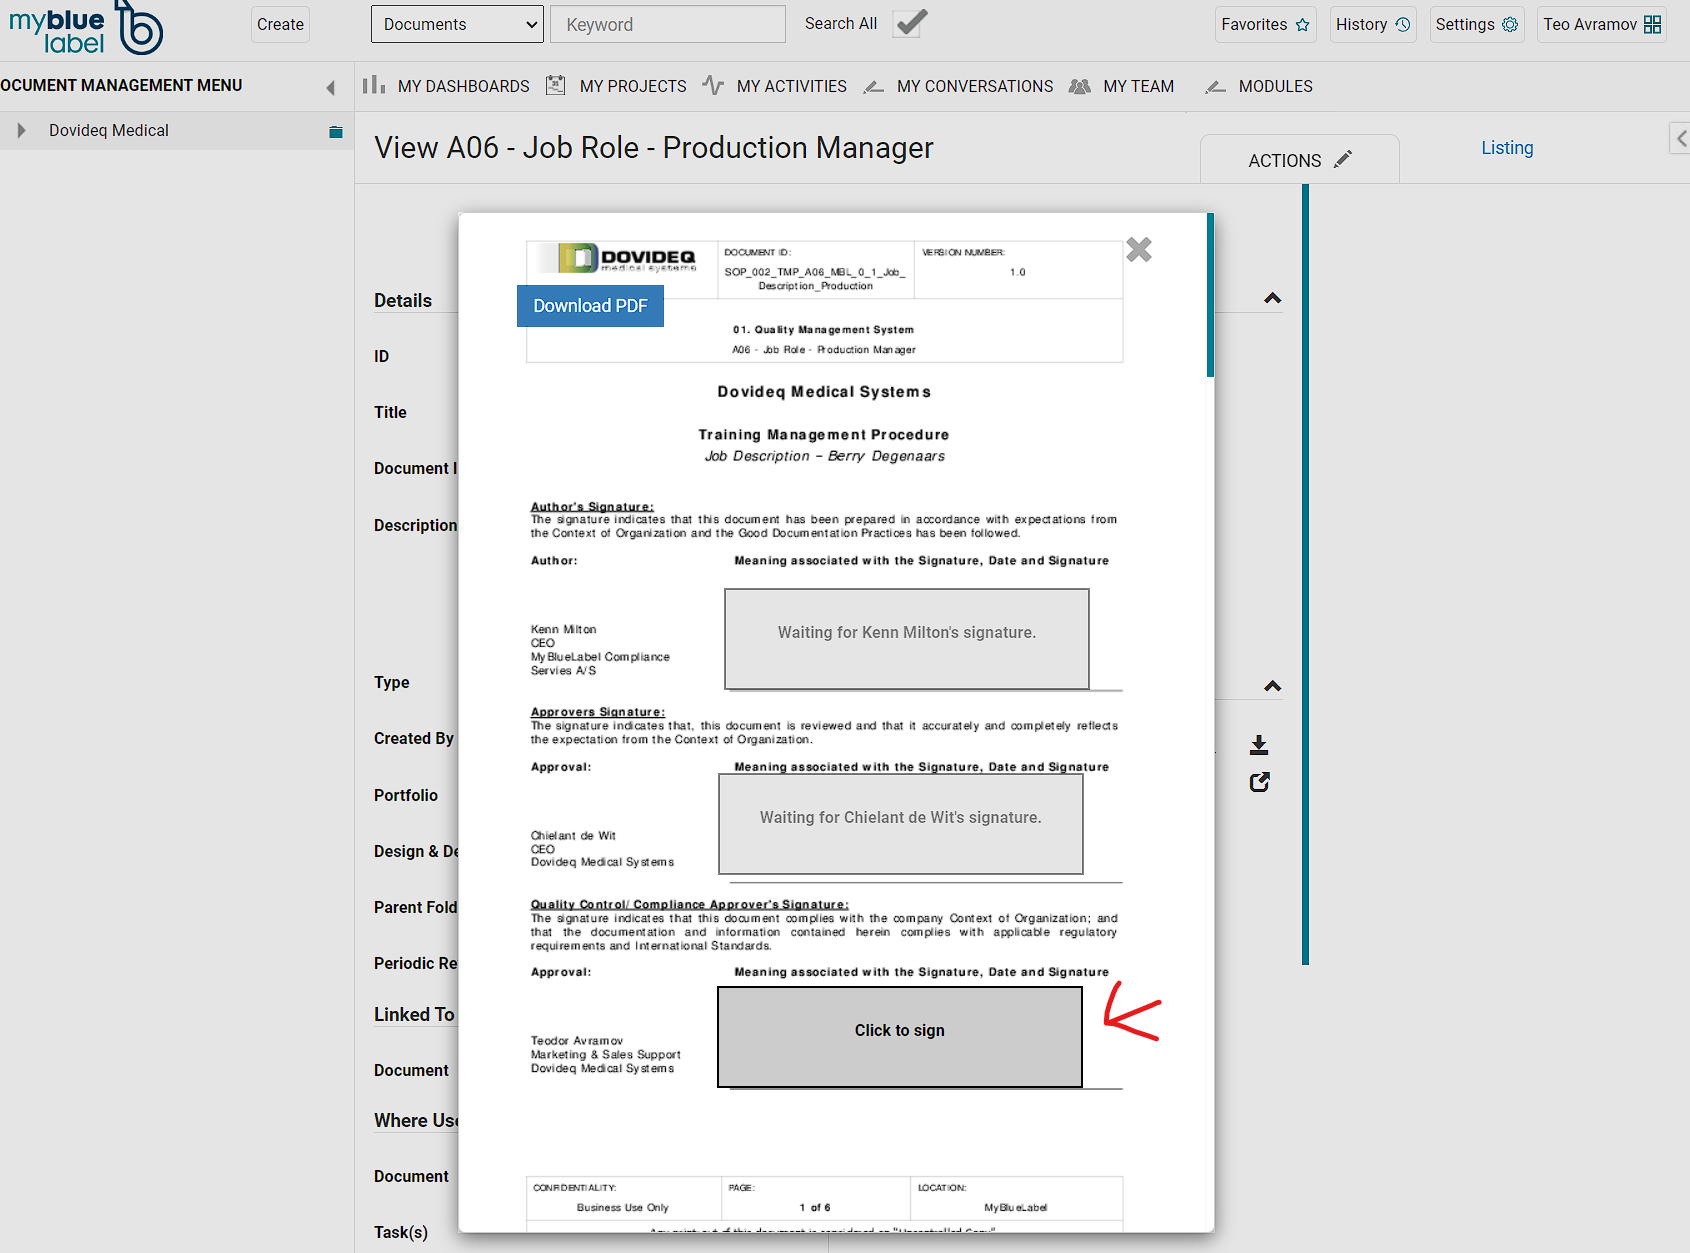
8) Finally, input your username/password and check author/approval depending on your role (if its not any of those two input your role in the Message Box). Click "Sign" to sign

Congratulations! Now you know how to sign a document.

