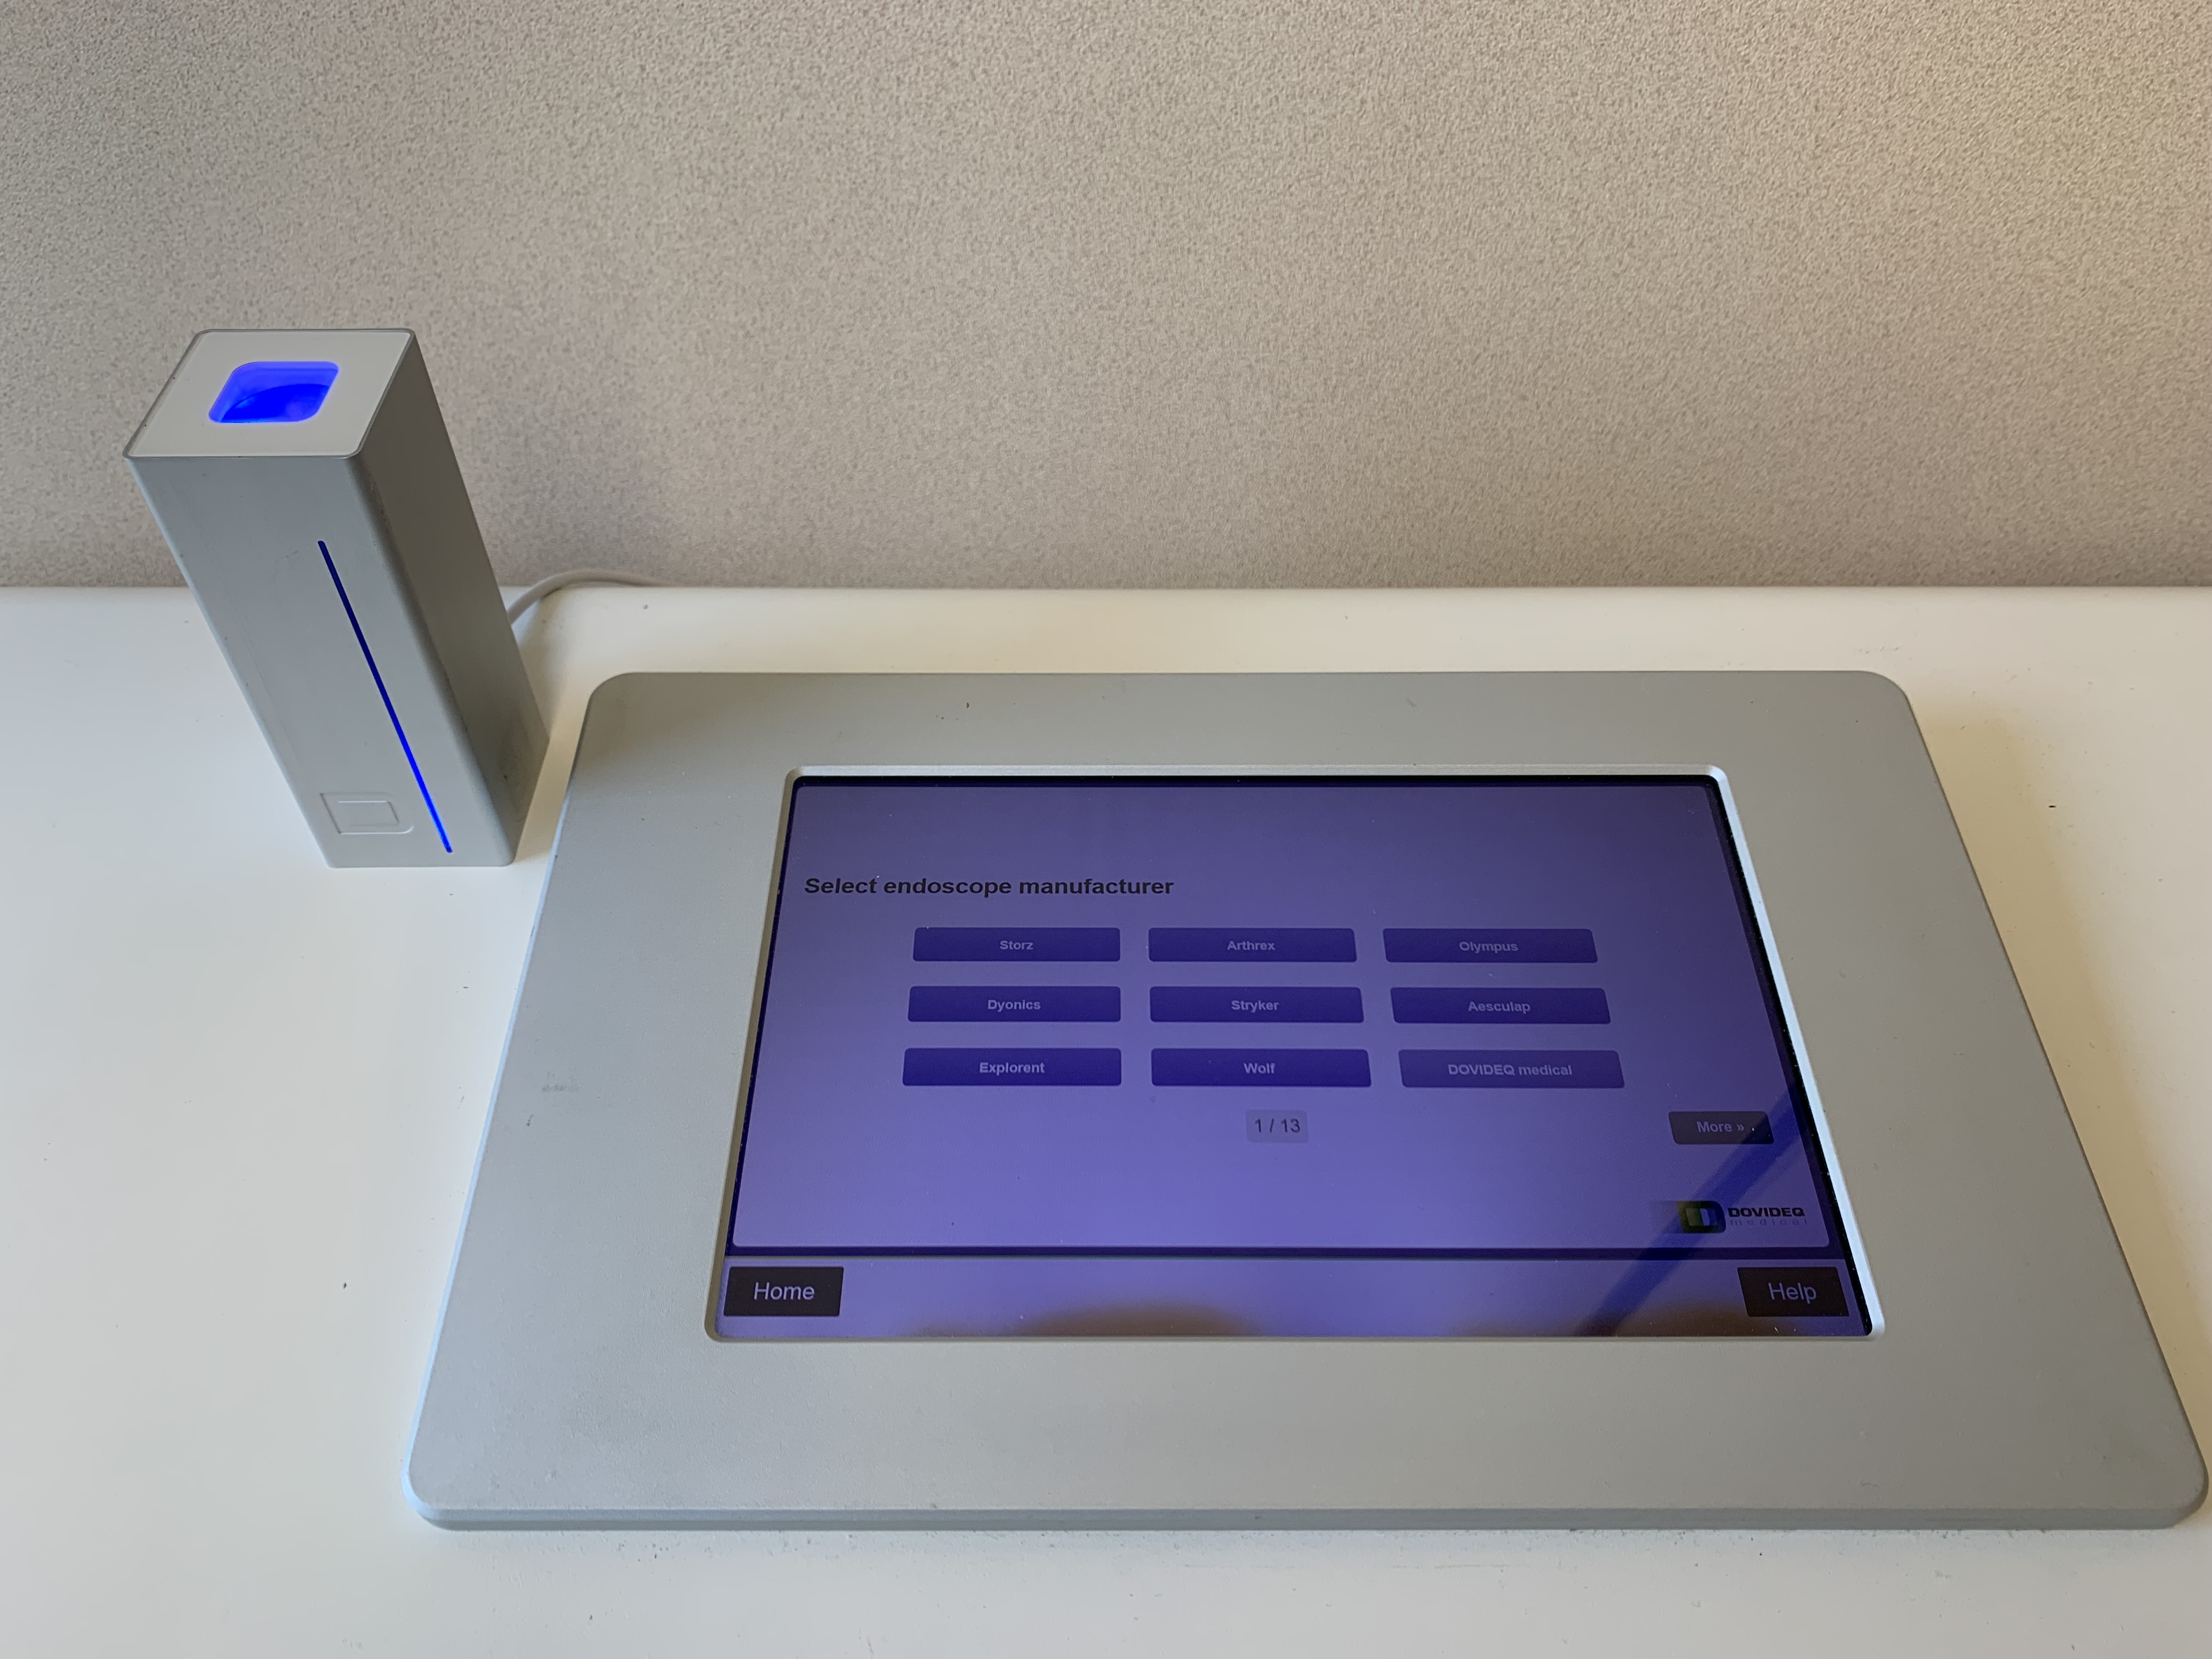
Scanning the datamarix code will skip the selection buttons.
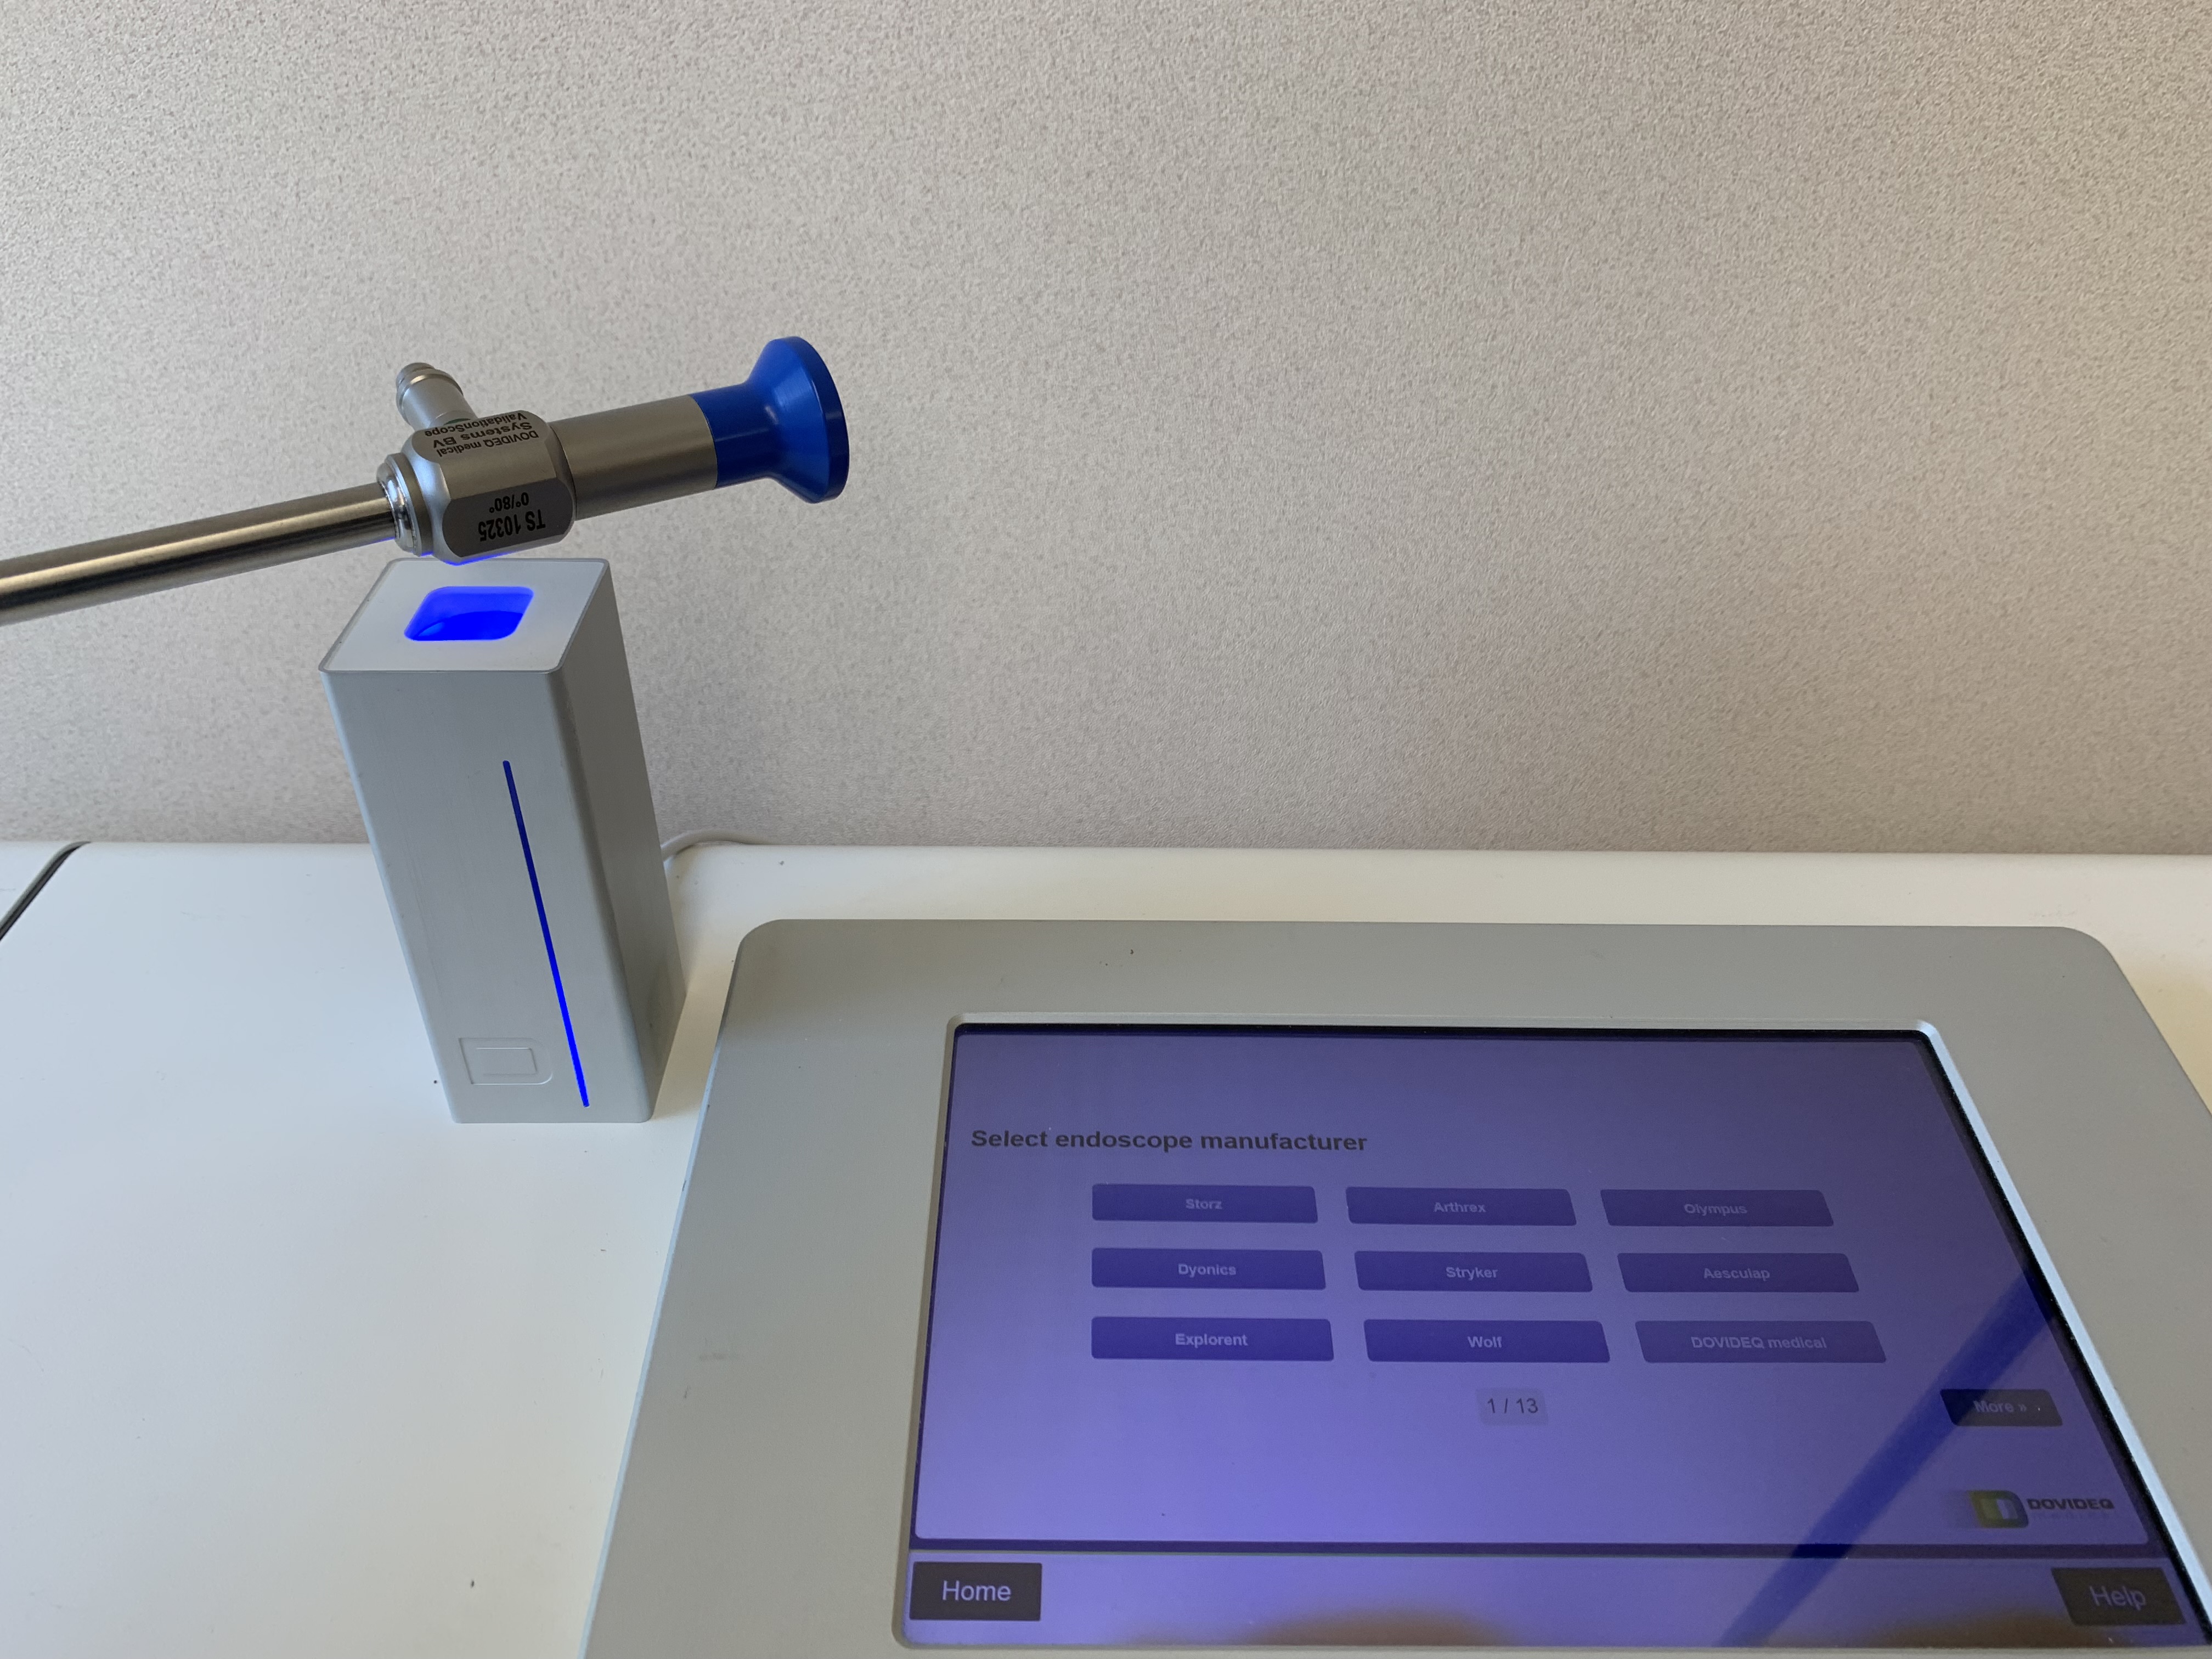
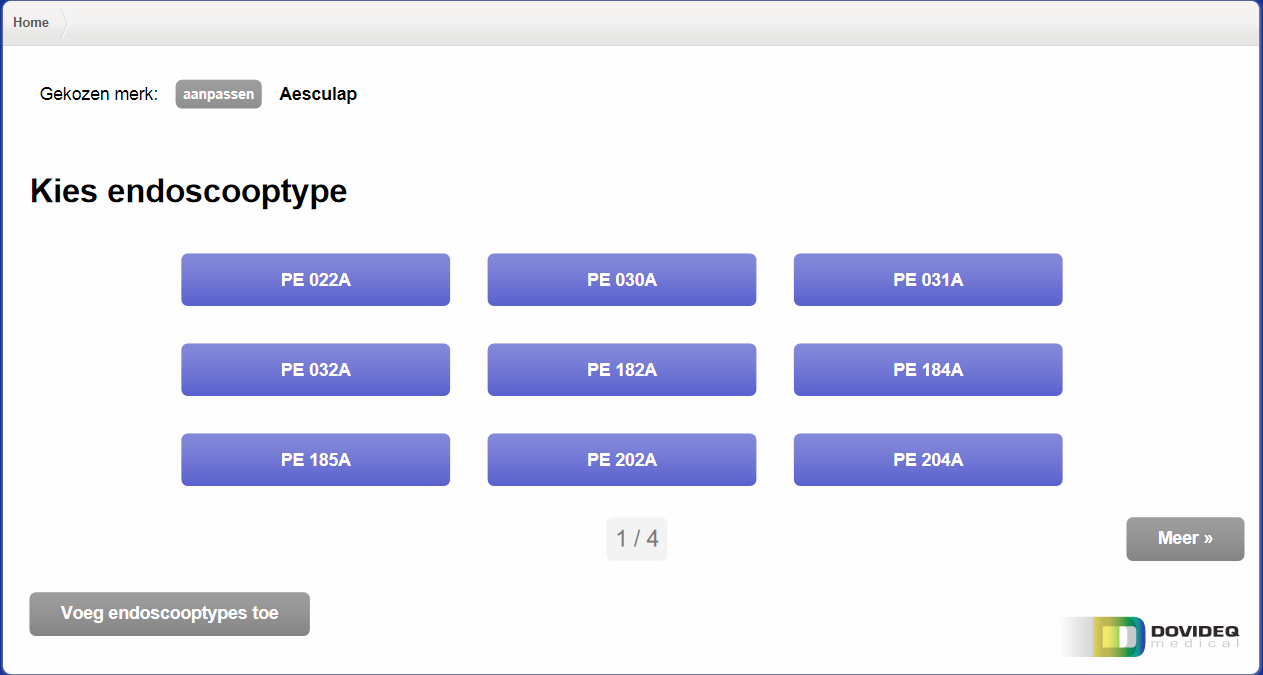
In case the scanning does not work, your scope does not have the datamatrix code registered in EndoscopeManager. If you add it the the scope in EndoscopeManager, it will be added in your ScopeControl as well and it should then work. Selecting manually can be done as well, by selecting brand, type and serial.
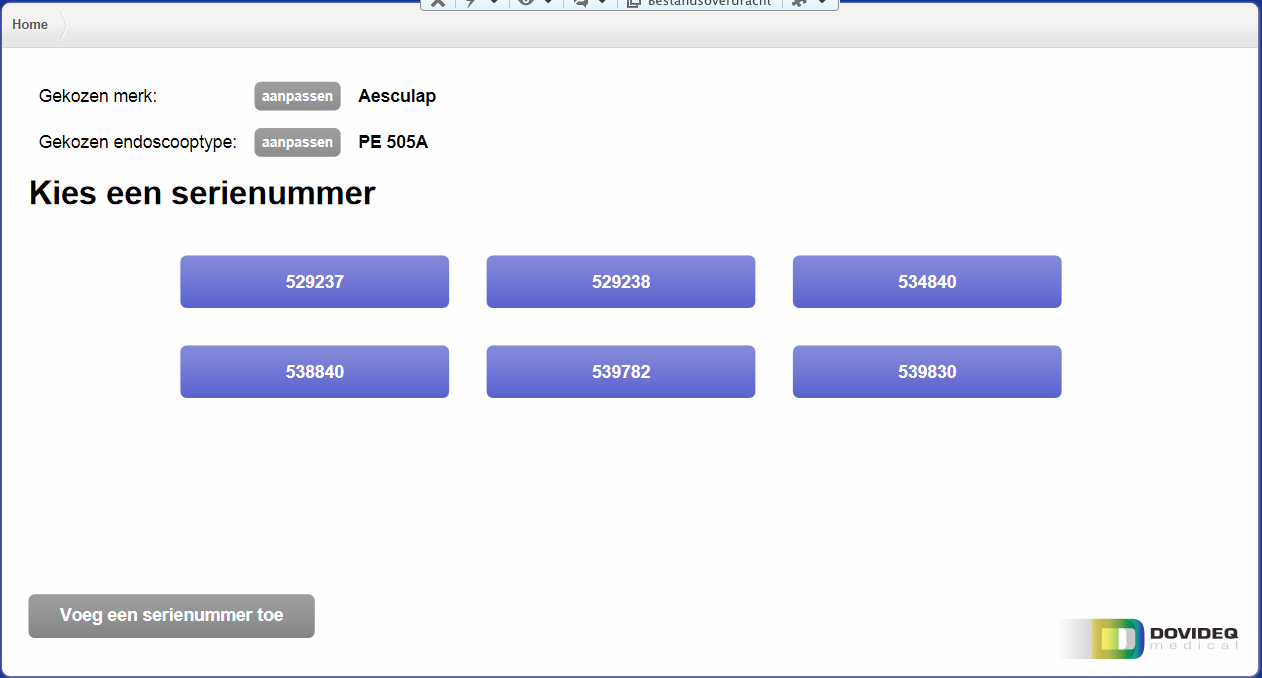
After selecting the serial, you will be able to start the measurement.
Position the endoscope. First open te cover.
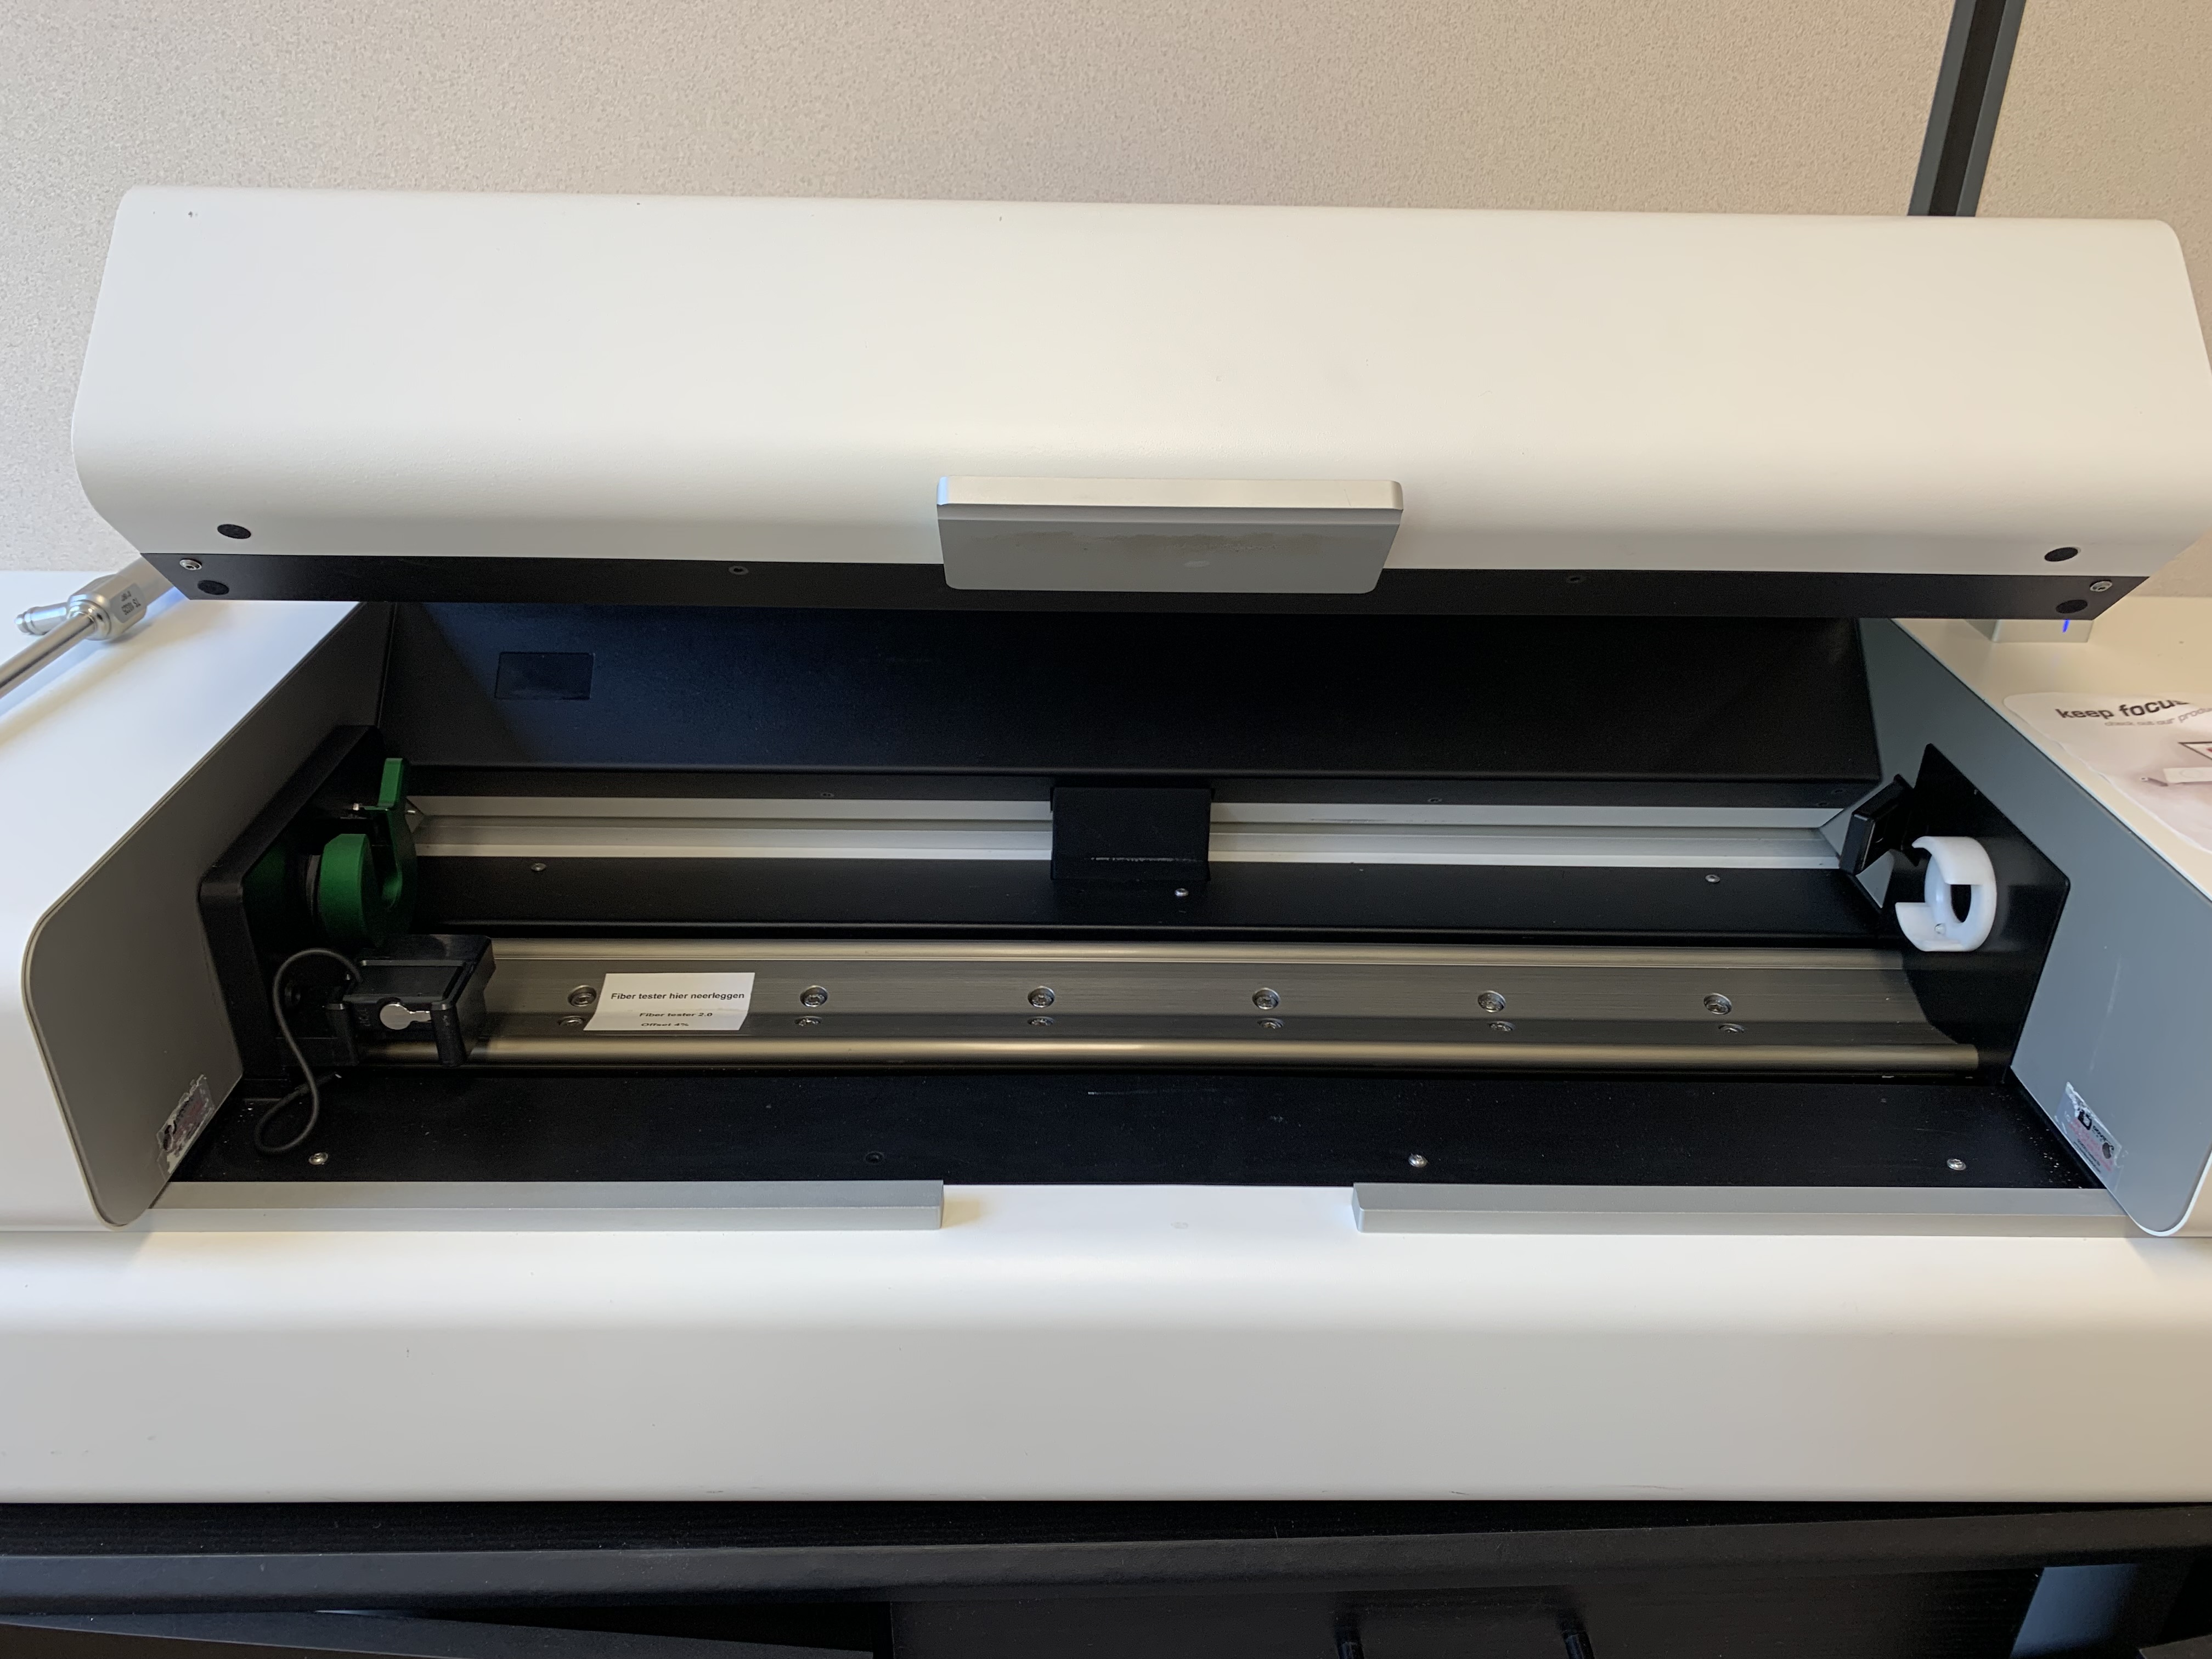
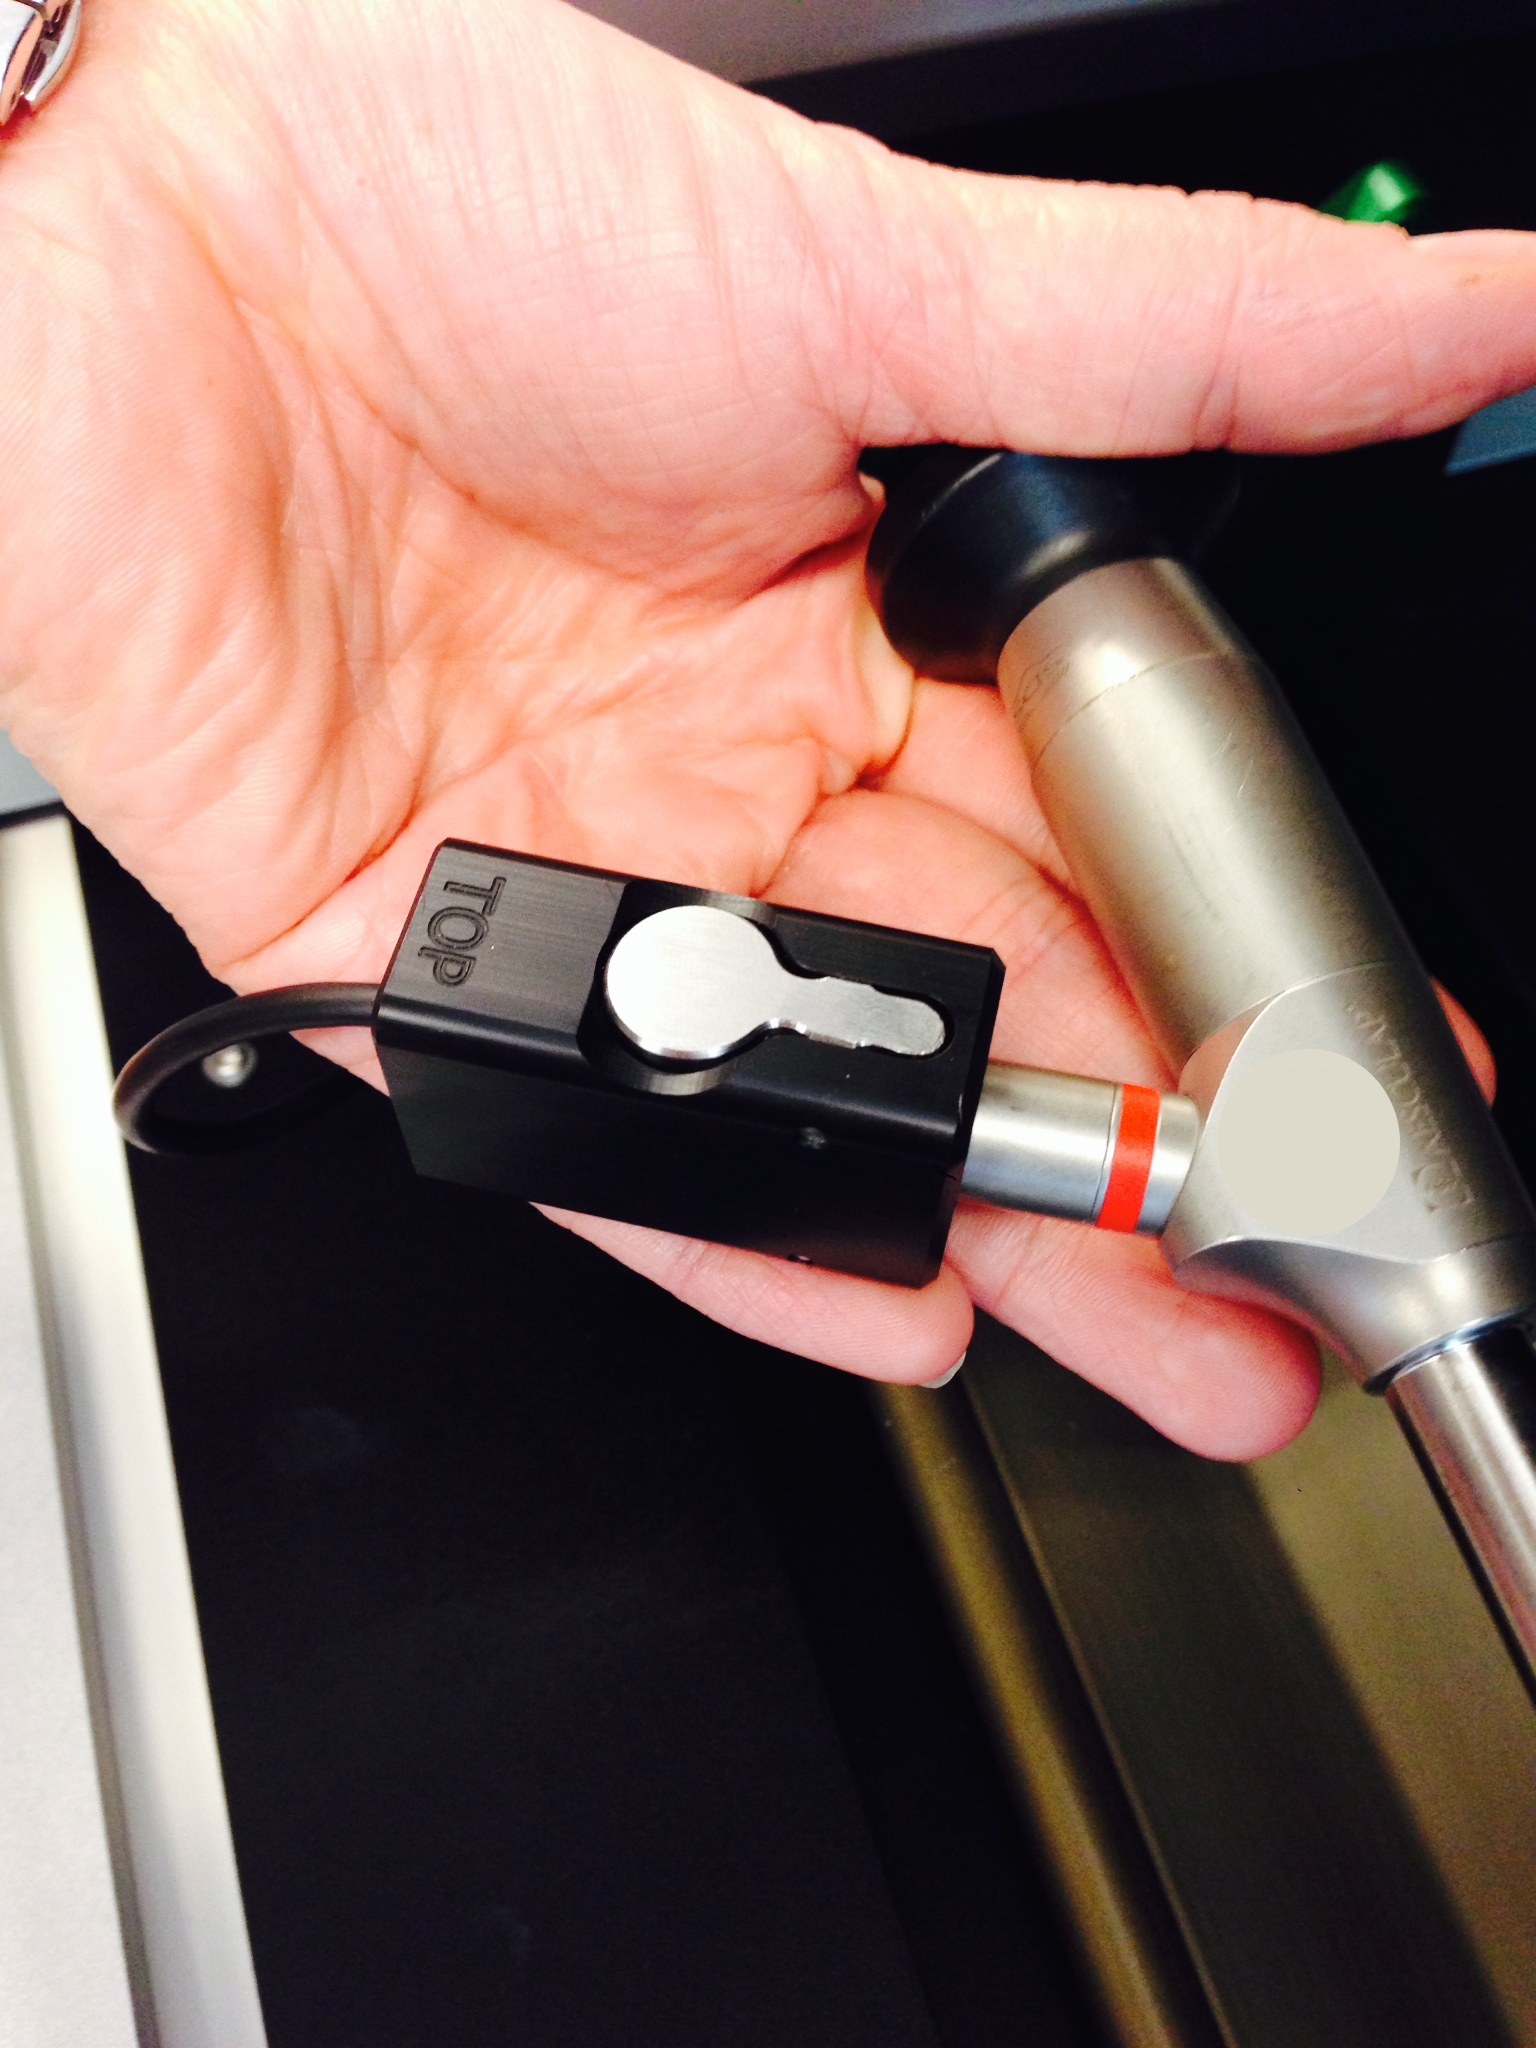
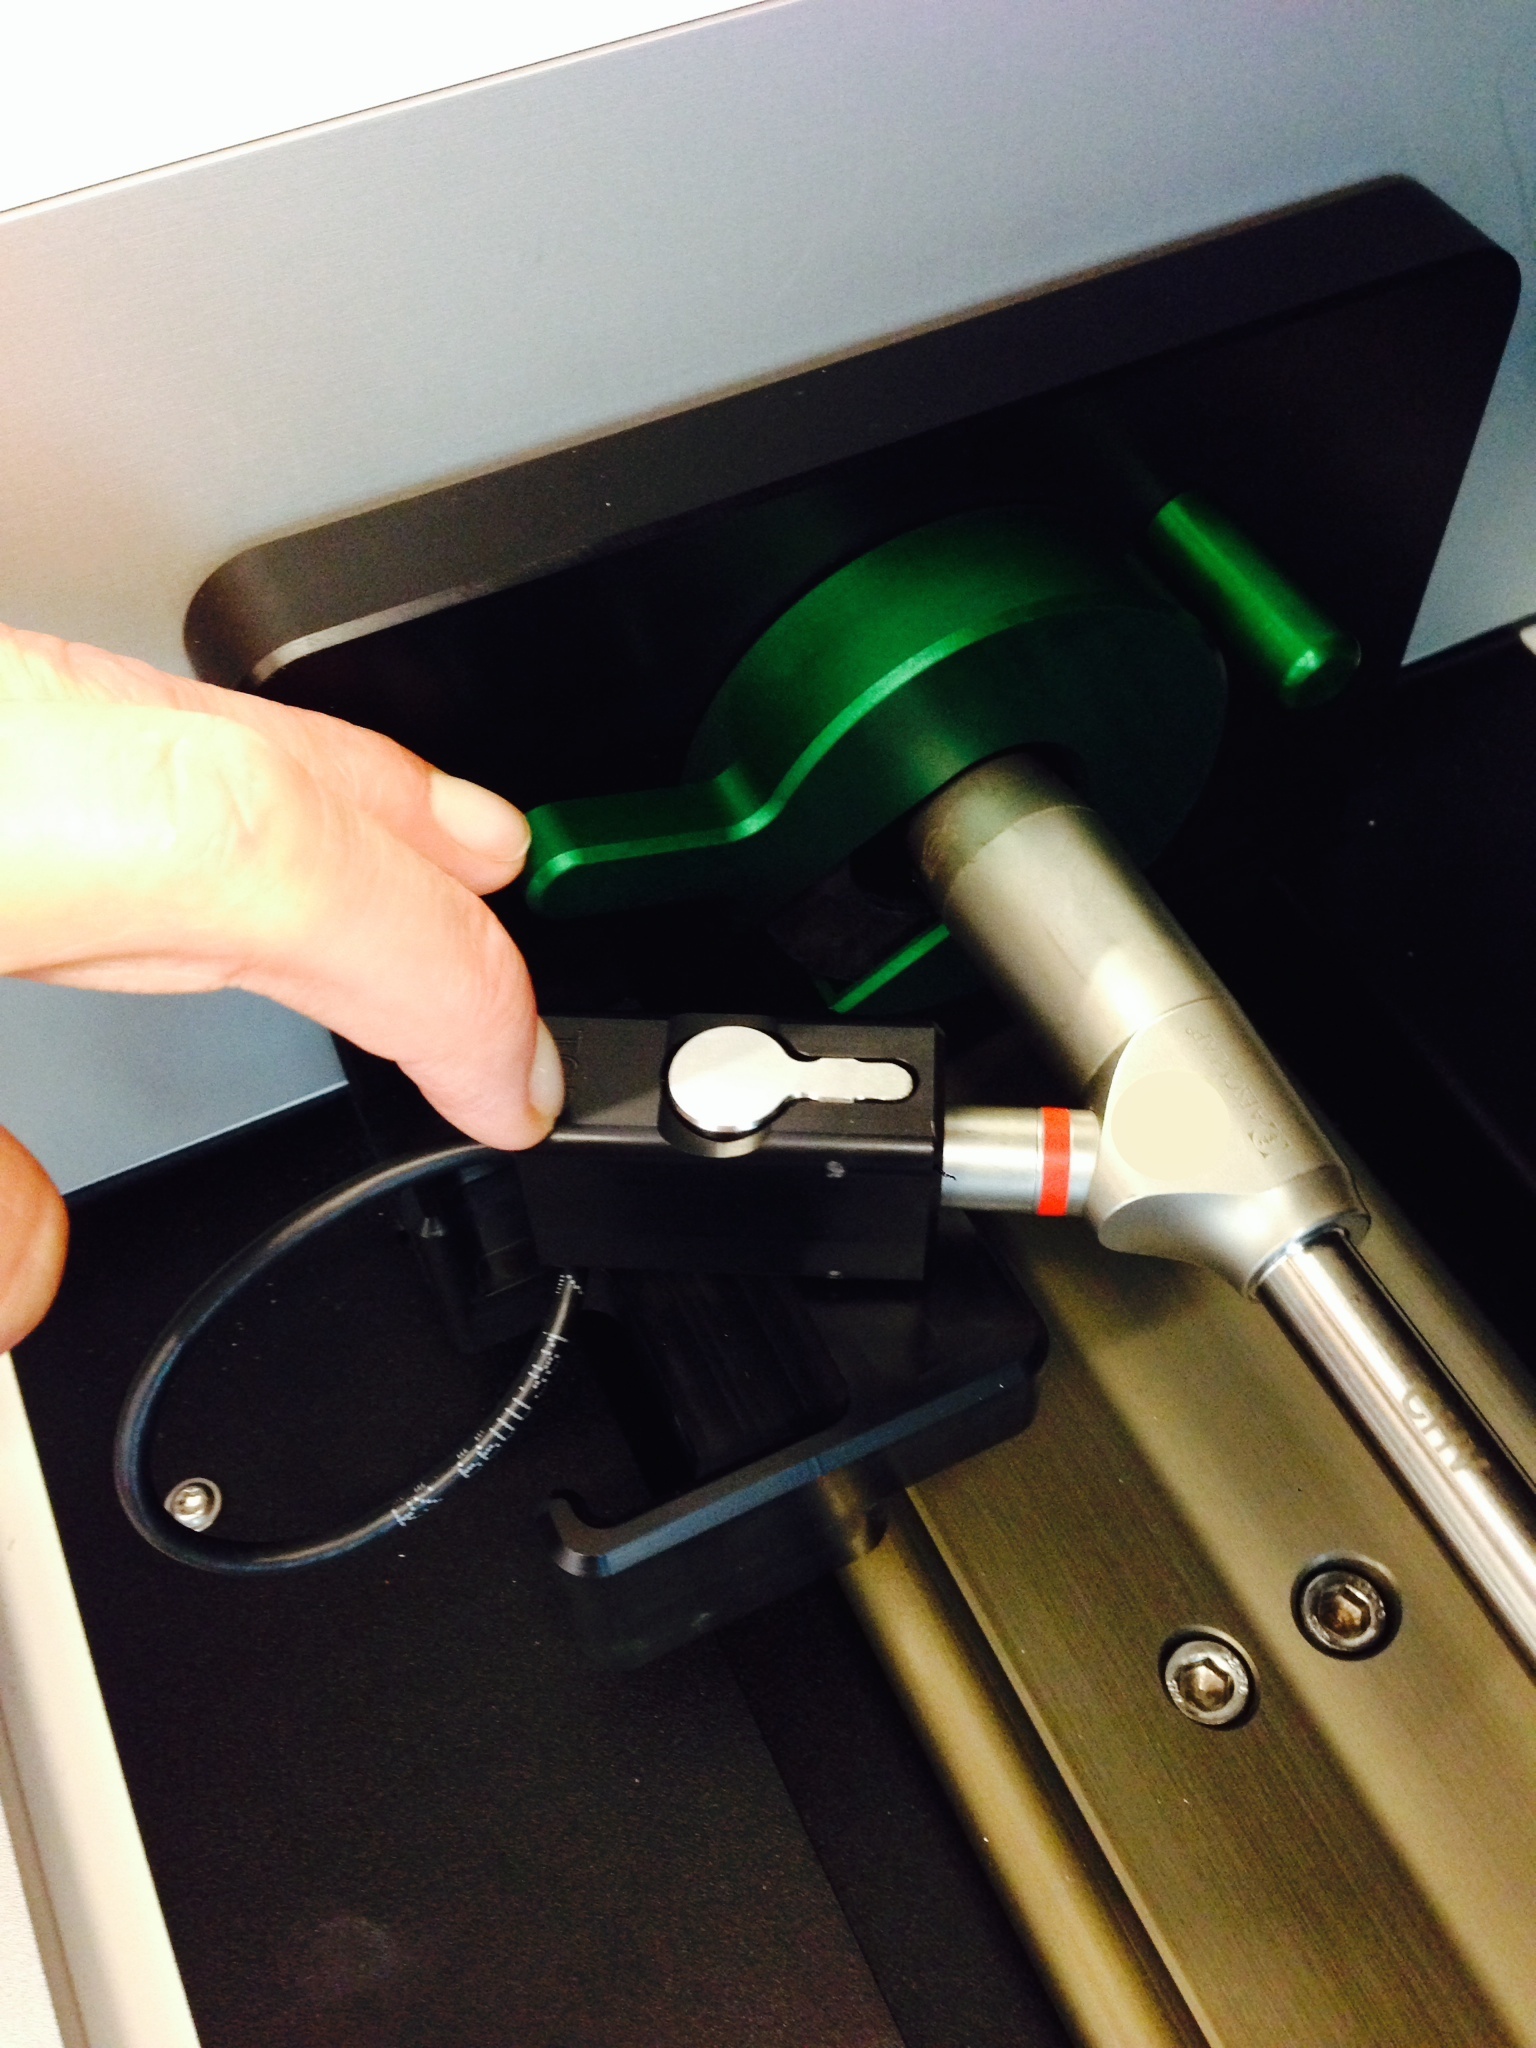
3. Connect the fiber sensor to the perpendicular Storz connector on the scope.
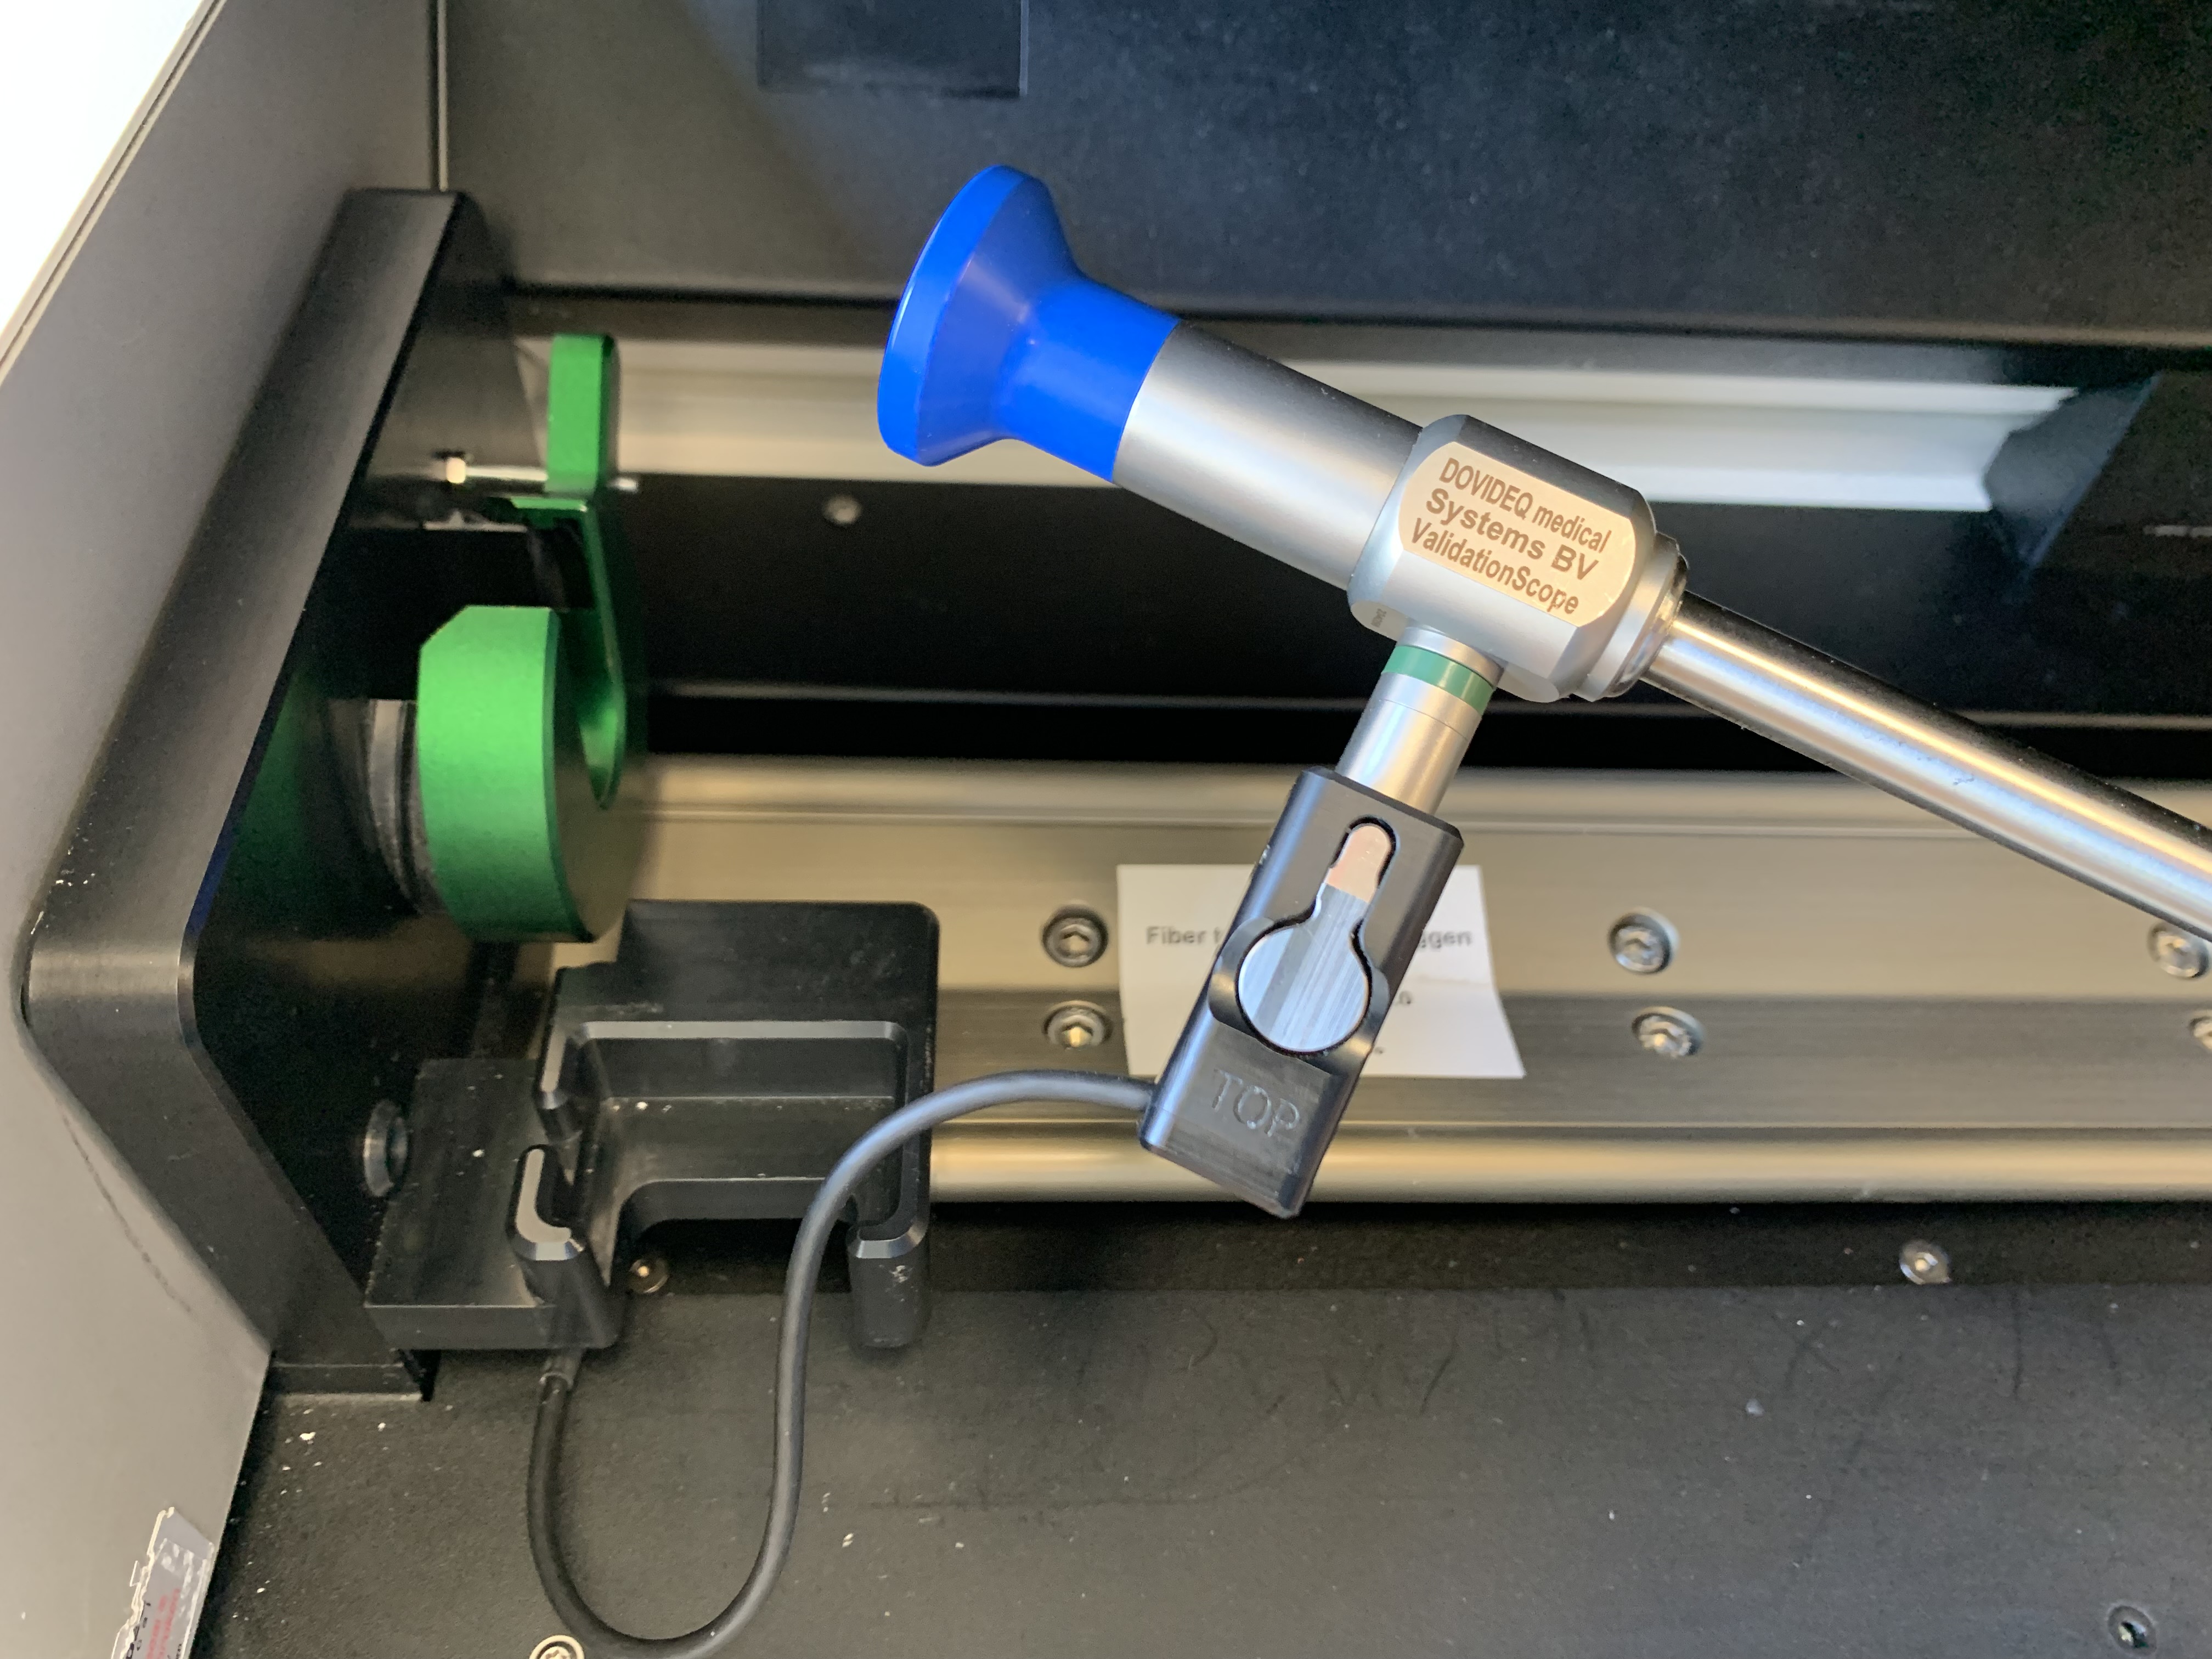
4. Position the endoscope in the holder by placing the eye-piece against the black plate, move it slowly downwards and turn the green fixture clamp towards you. Make sure that the text "Top" on the fiber sensor is aiming up and the other side of the fiber sensor is resting on the fiber sensor holder. The end result should look like this.
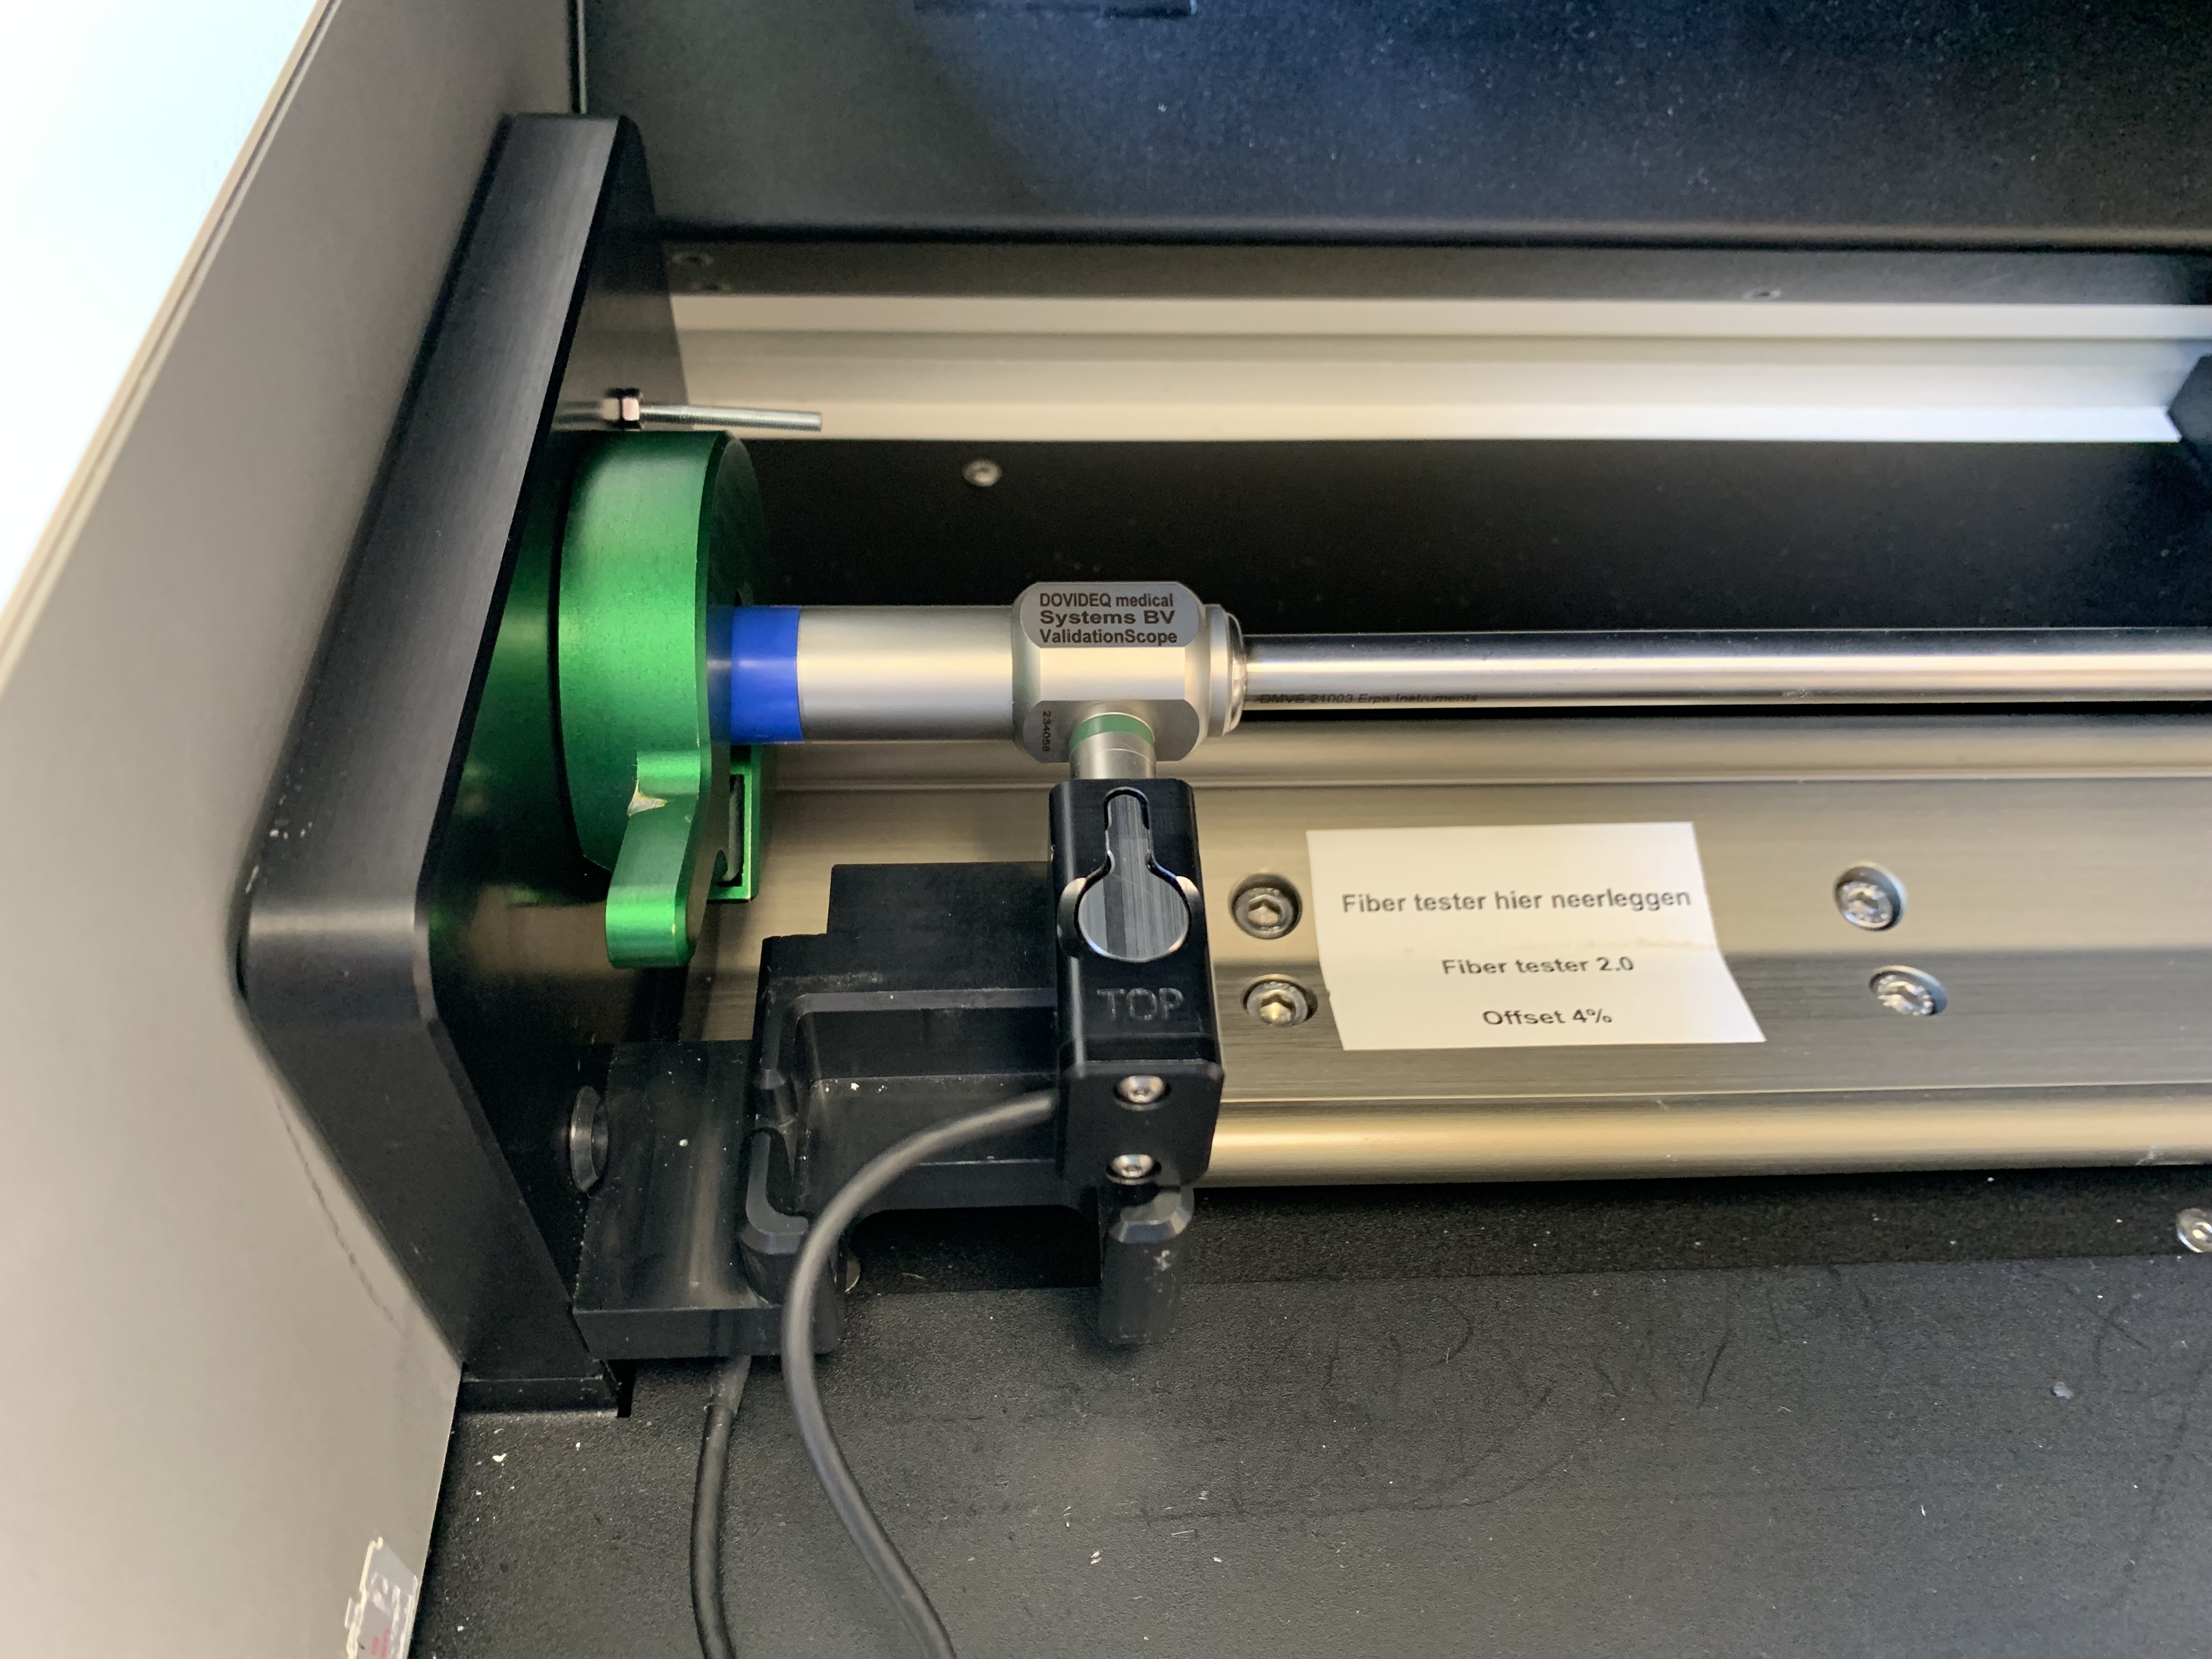
Misallignment of the scope will result in misallignment of the camera image
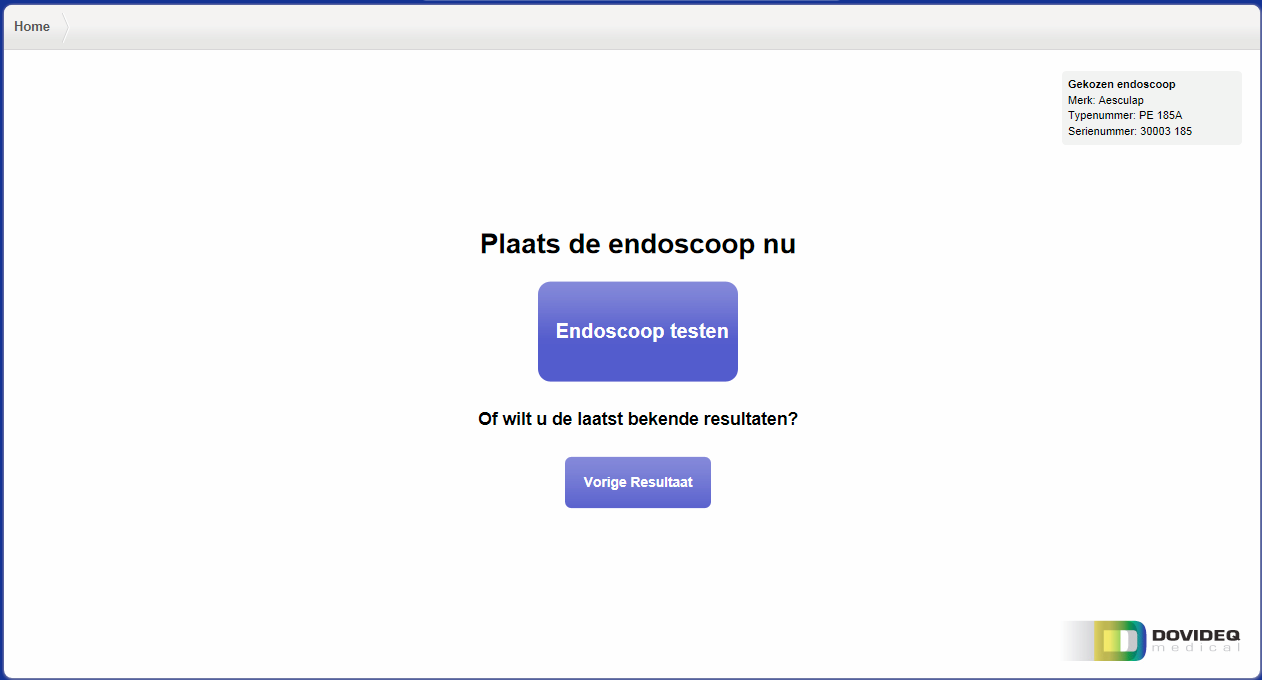
Close the cover and start the test by pressing the "Test Endoscope" button.
Wait for the test results.
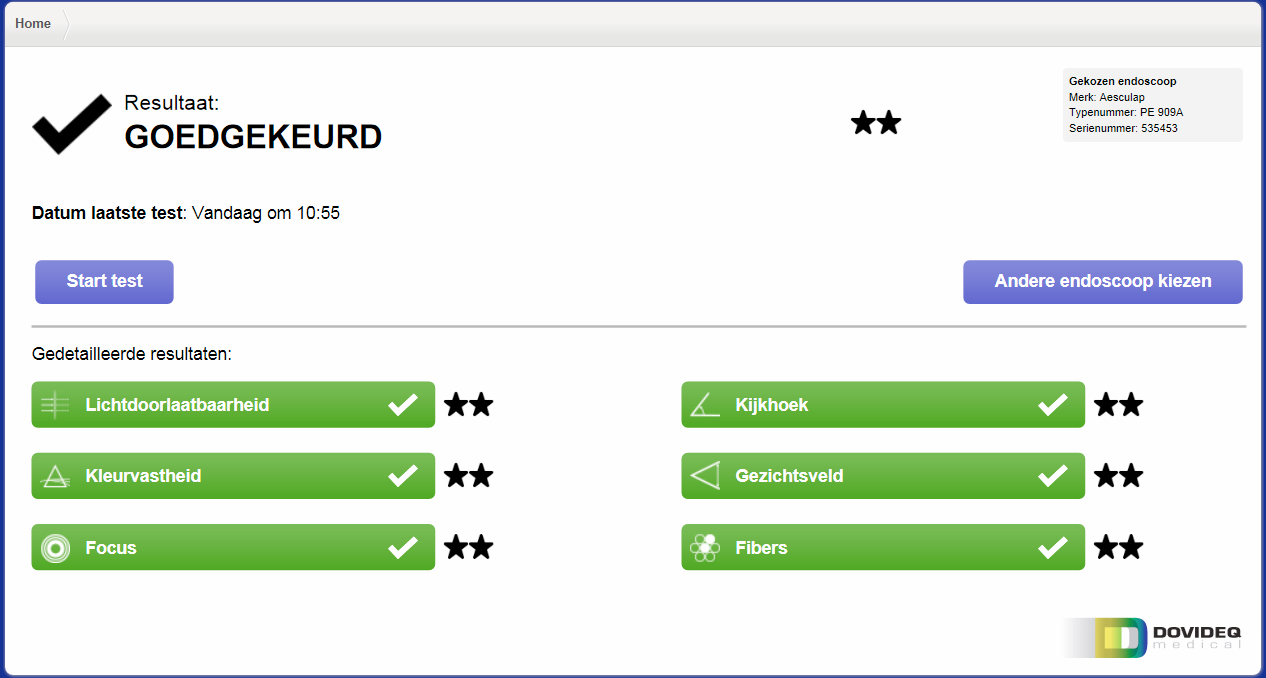
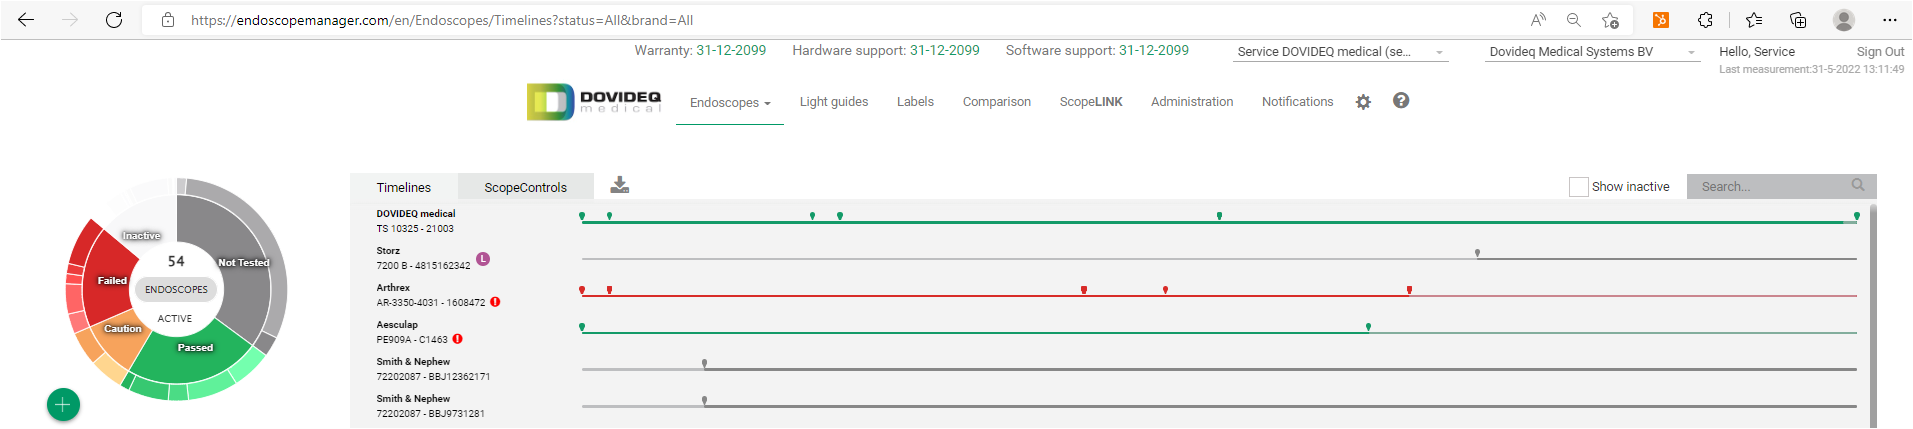
Checking the results in Endoscopemanager.com
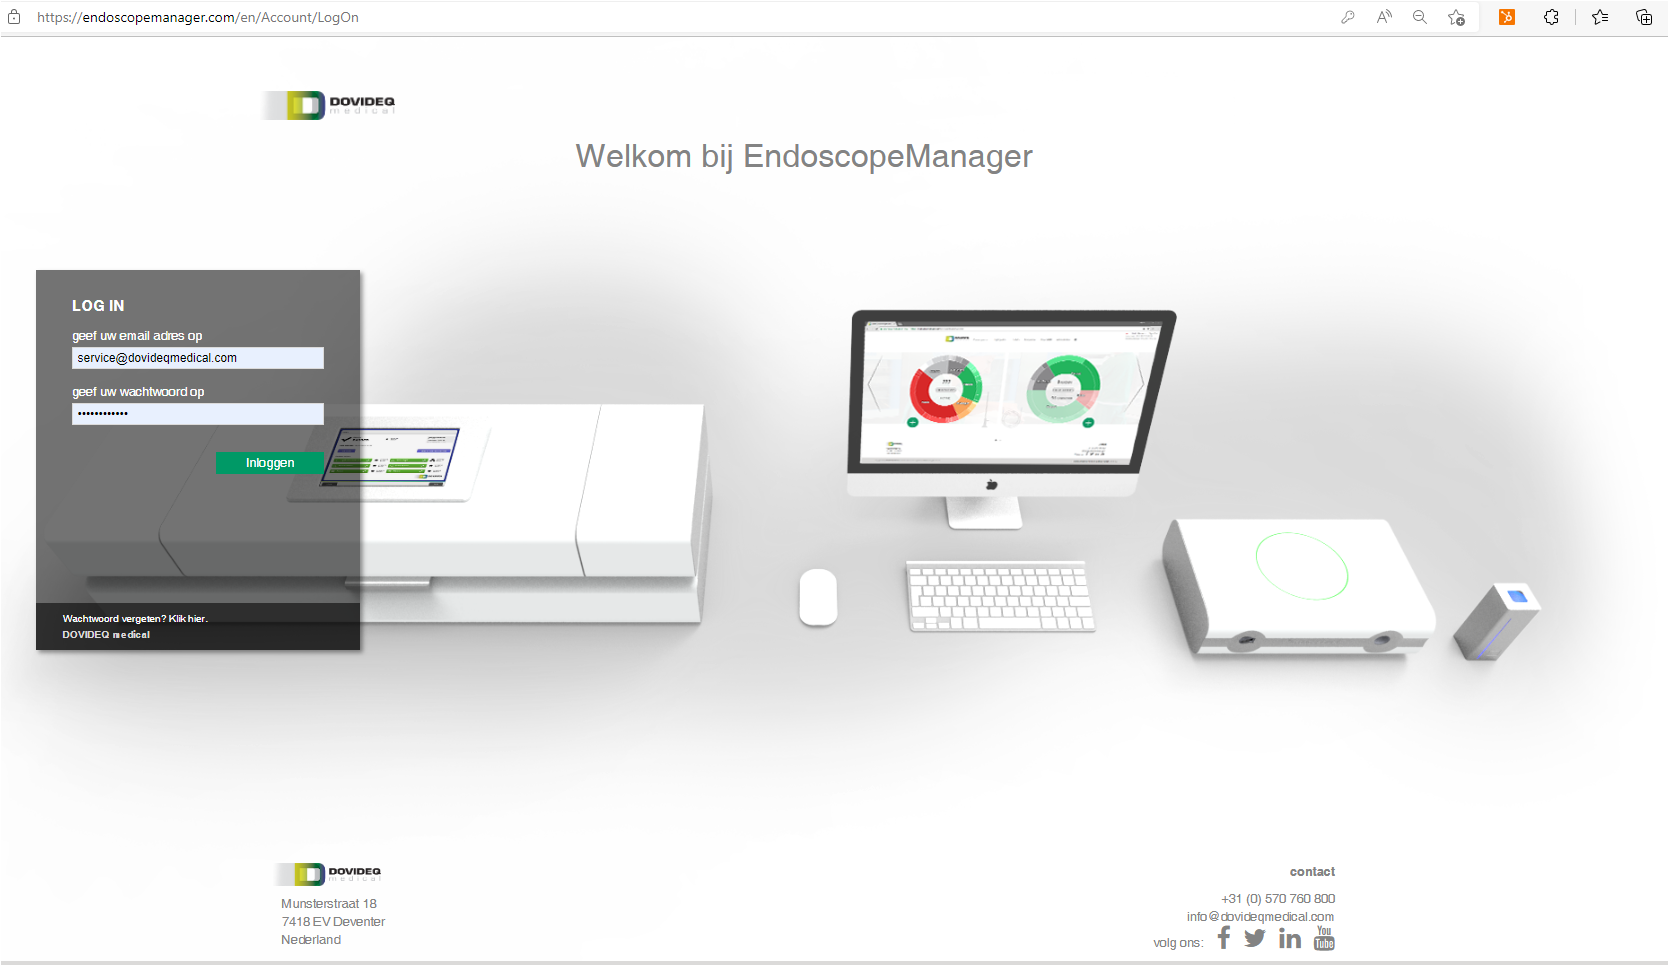
Go to www.endoscopemanager.com and fill in your login credentials. In case to forgot your password, you can have them reset here as well.
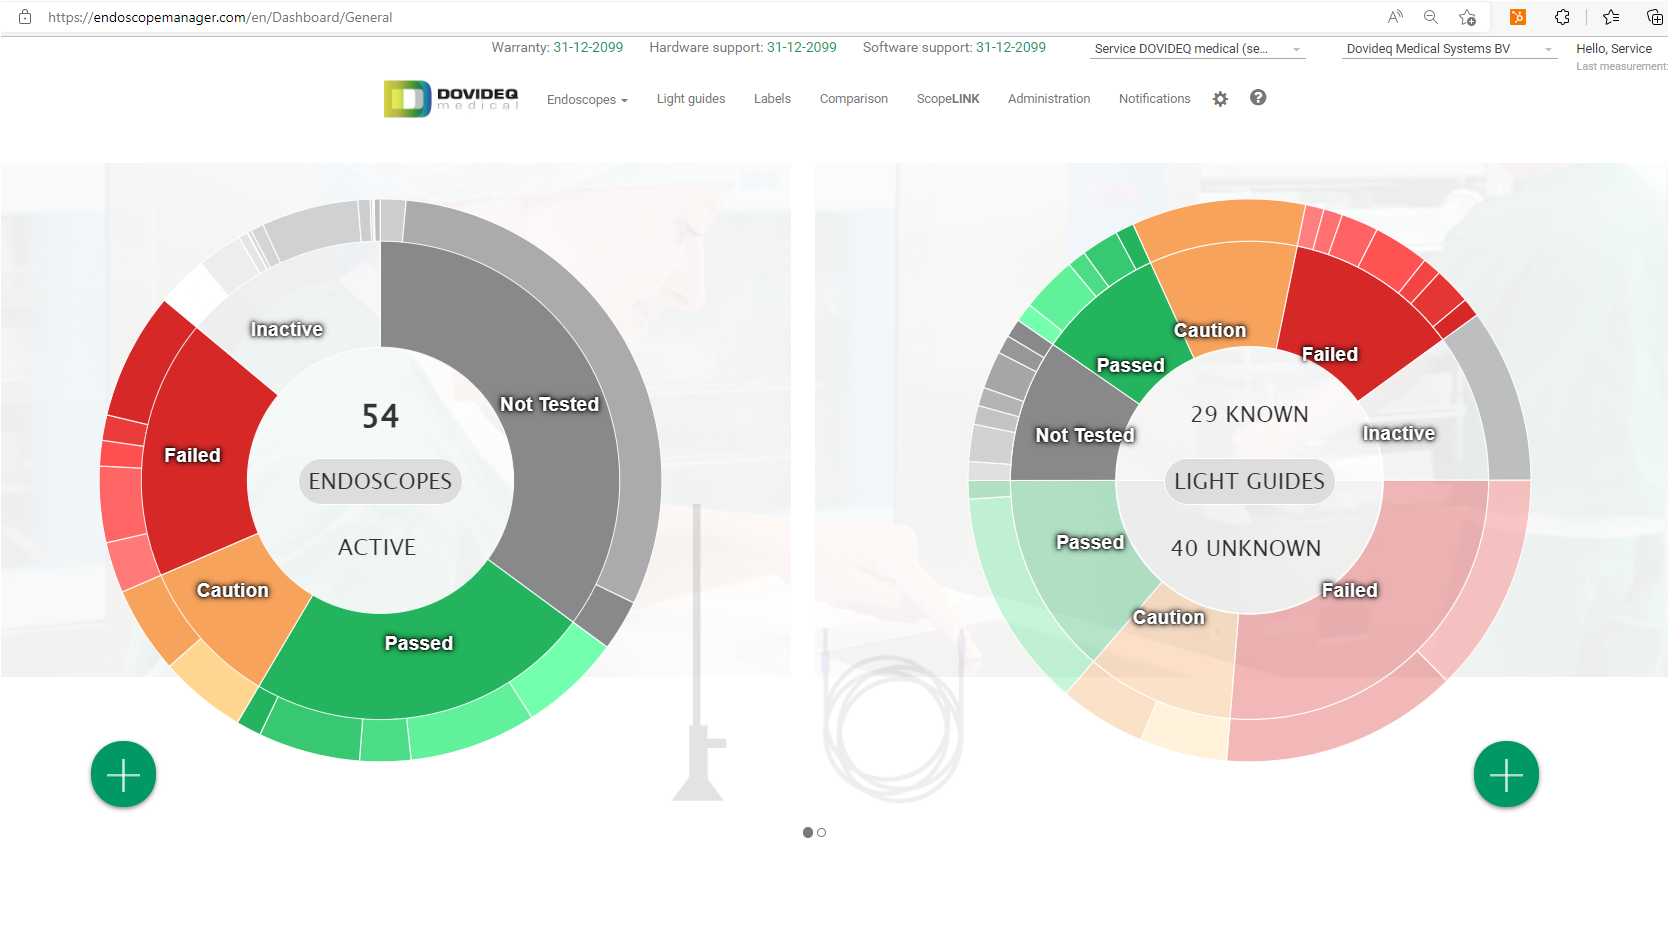
Click in Dashboard on "Endoscopes" or in the middle of the left Endoscopes pie chart.
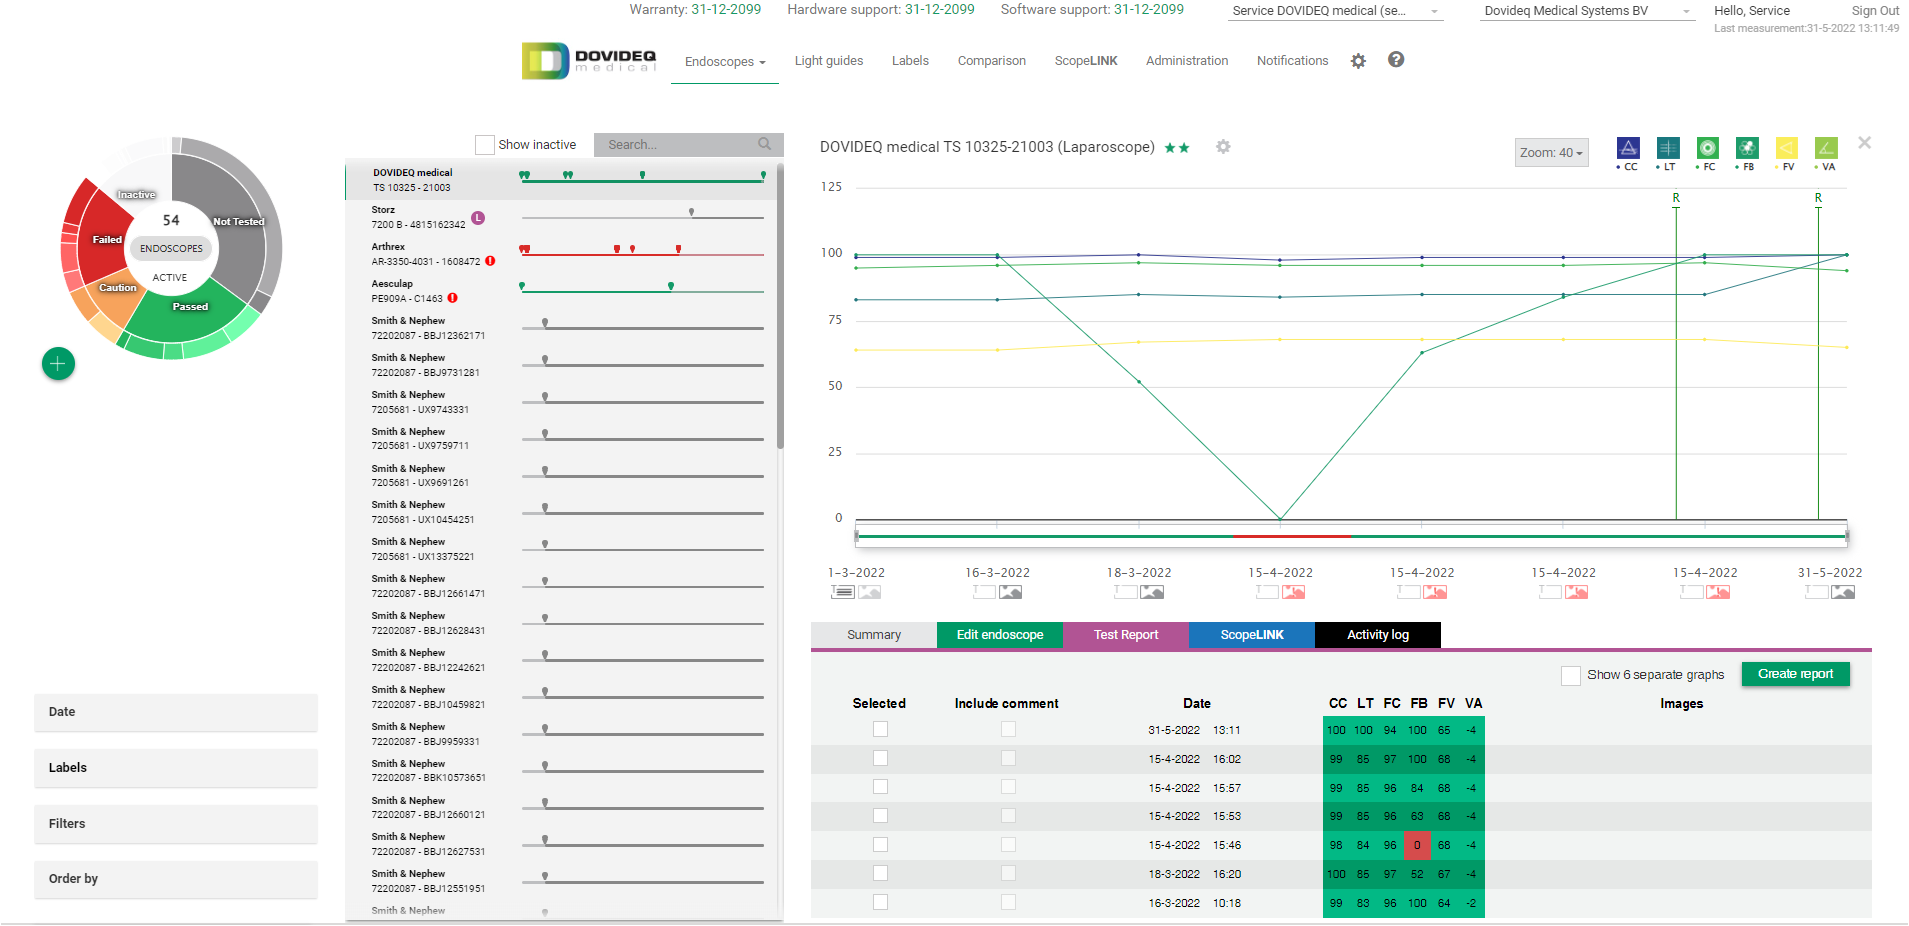
Click on the last endoscope you measured, the top one is always the most recent one.
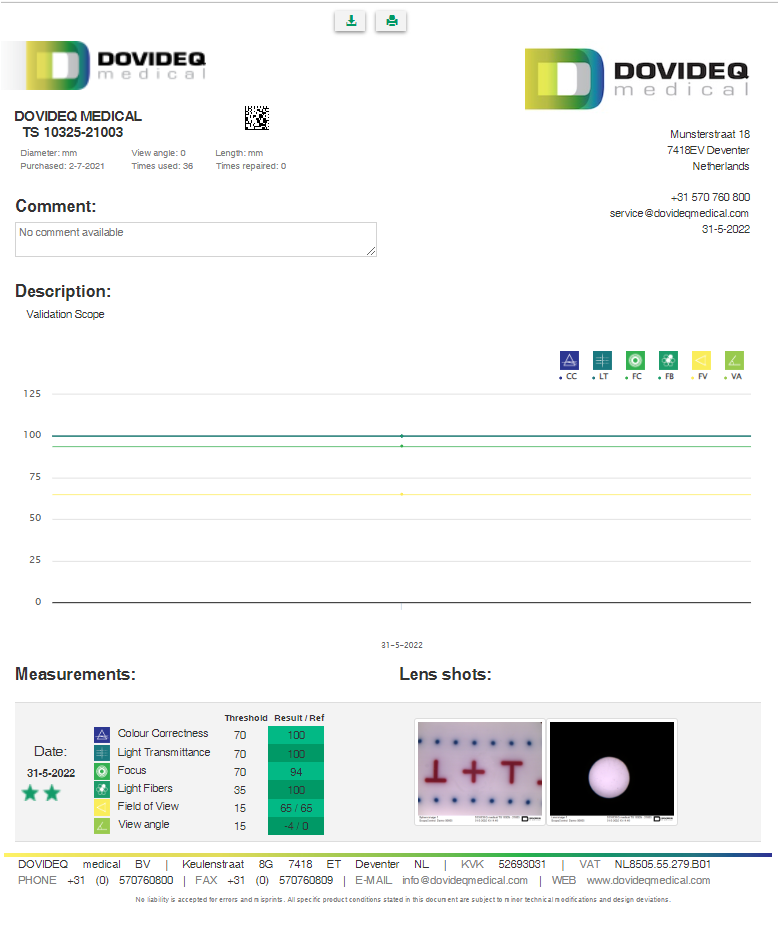
Click on the tab "Test report" and observe the test results.
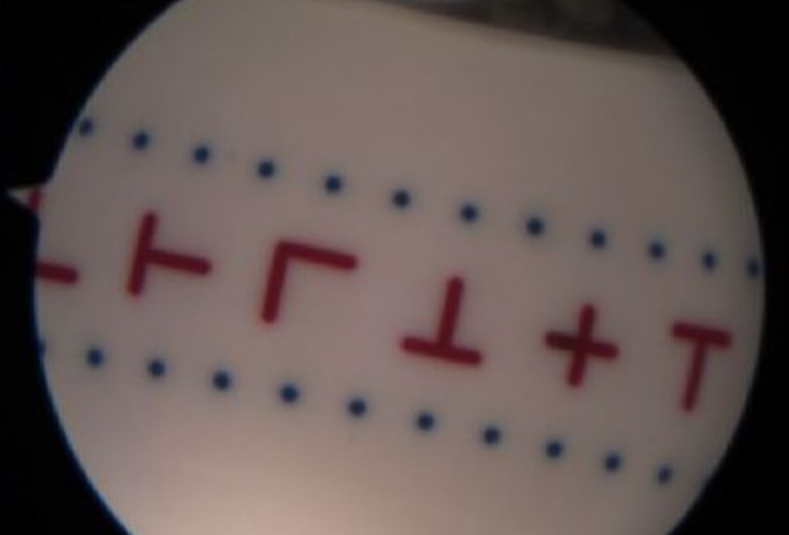
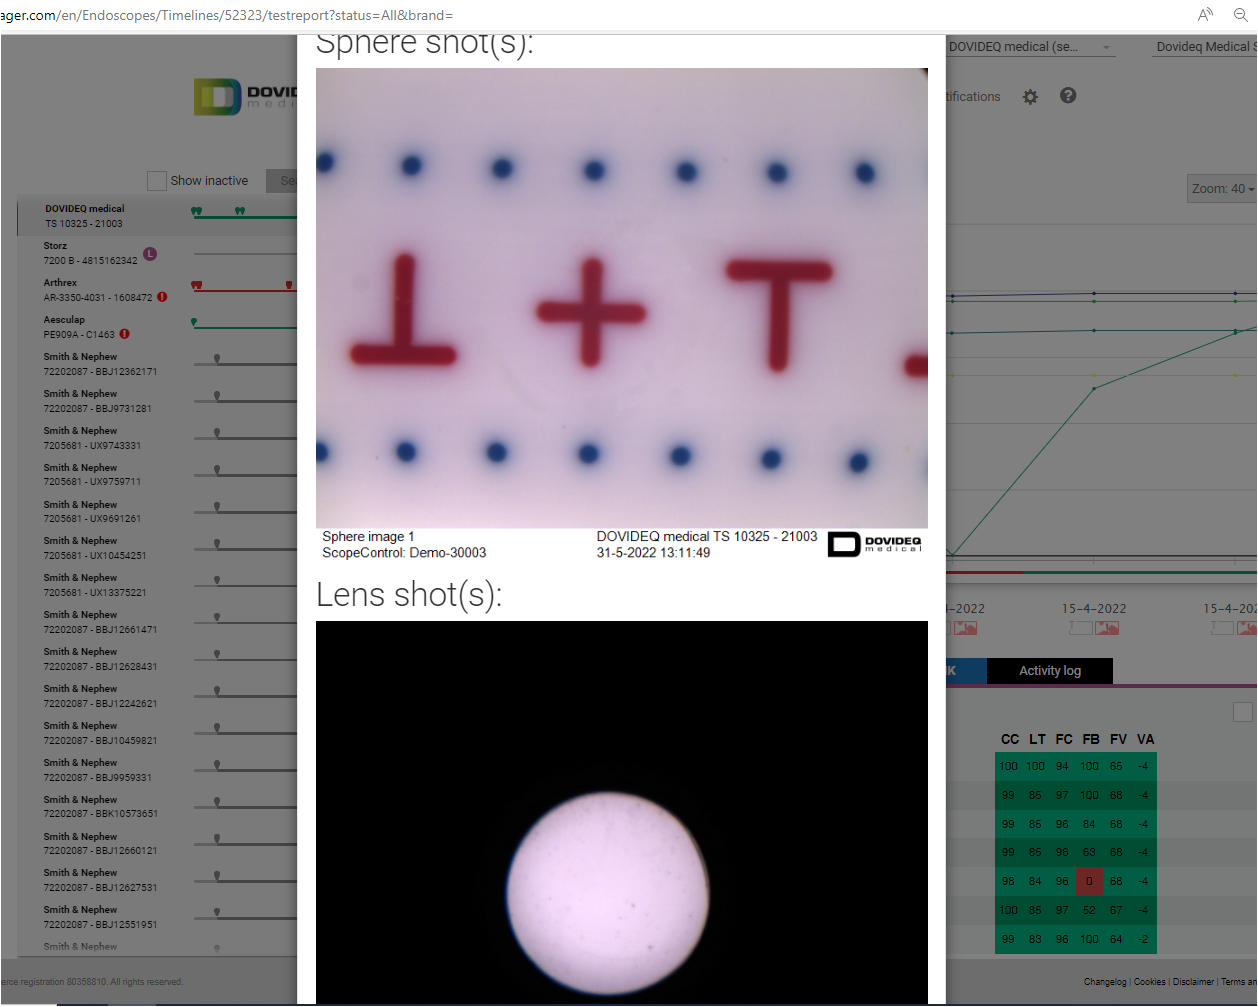
Click on the picture symbol under the date and check the Sphere and lens shots.
Click the tickbox of the measurement and select the images you want to see.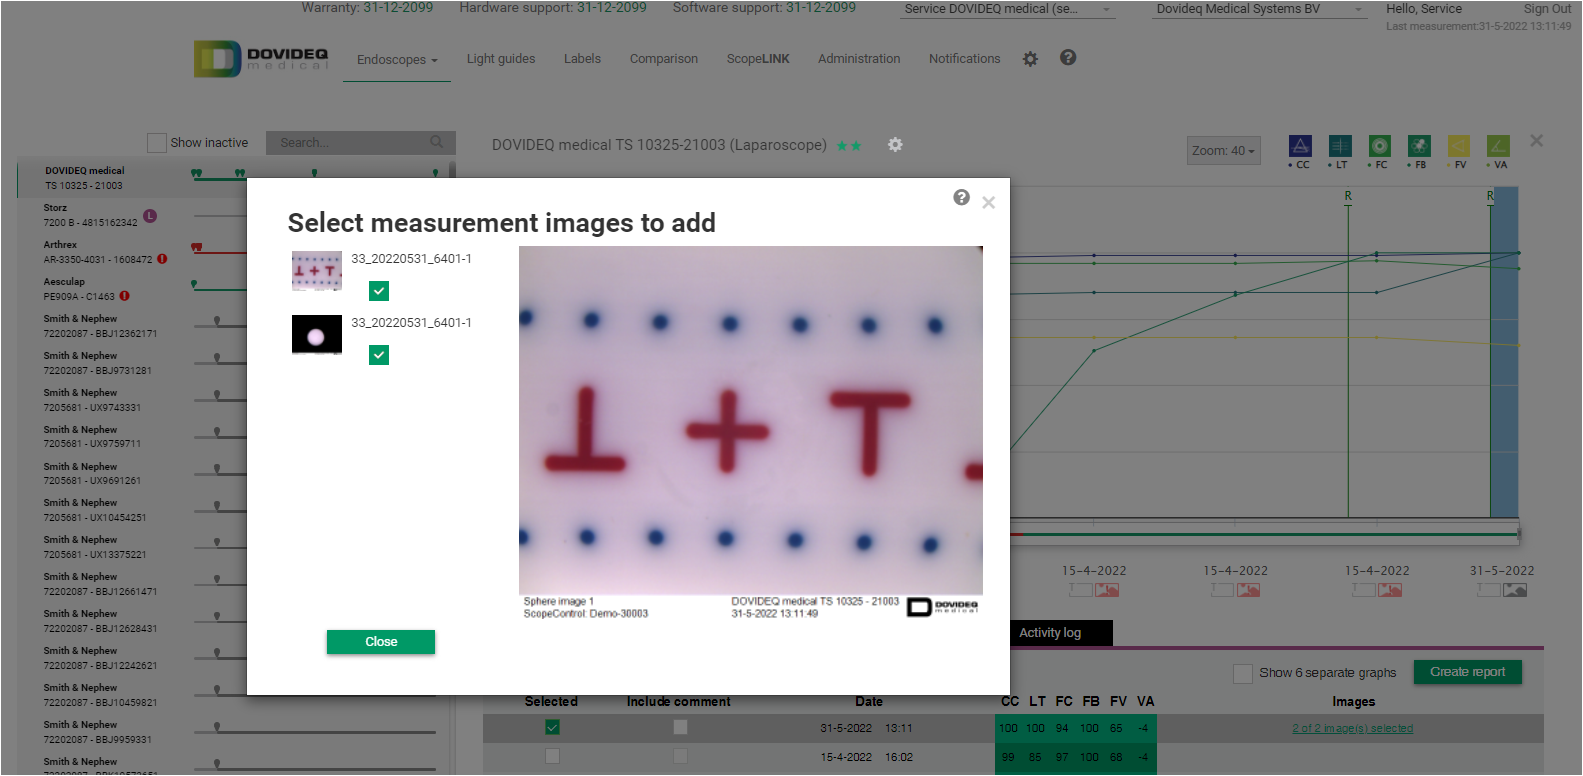
Click "Create report" to generate the report, you can download or print the report.
You're done.

